How to Adjust Titles in Apple Final Cut Pro
Apple Final Cut Pro steps itself forward with promising tools and functions for video editing that allows you to create productions with features such as Duplicate Detection, Motion and Compressor, and professional color grading. Final Cut Pro also promotes easy post-production editing for MacBook and iMac users.

How to Adjust Titles in Apple Final Cut Pro
Among Final Cut Pro’s great features is a convenient function where it allows users to edit parts of a film or video with convenience. In this article, the different ways to adjust a title in Final Cut Pro will be explained.
-
Step 1: Edit Title Text

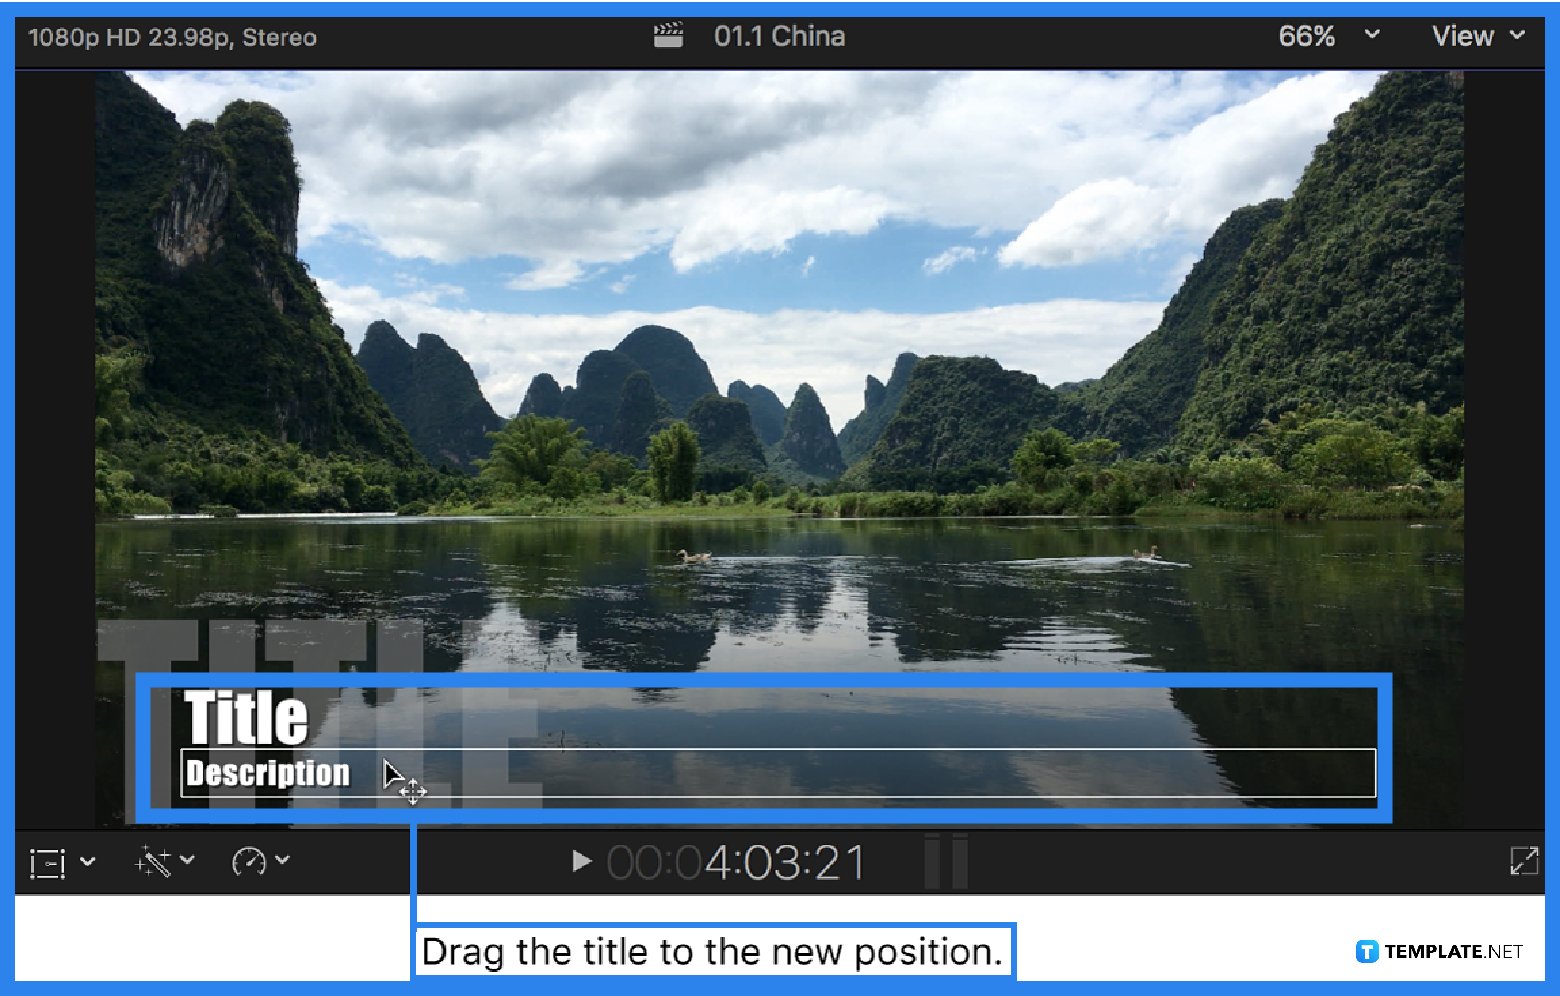
To edit a title text, select a clip in the timeline where the title text will appear, align the play head with the selected title clip, and then double-click the title clip in the timeline. Next, you can either double-click the text object in the viewer or select the text in the Text Inspector. Afterward, you can edit the text or text title and press COMMAND +Return to exit text editing. -
Step 2: Change Title Color

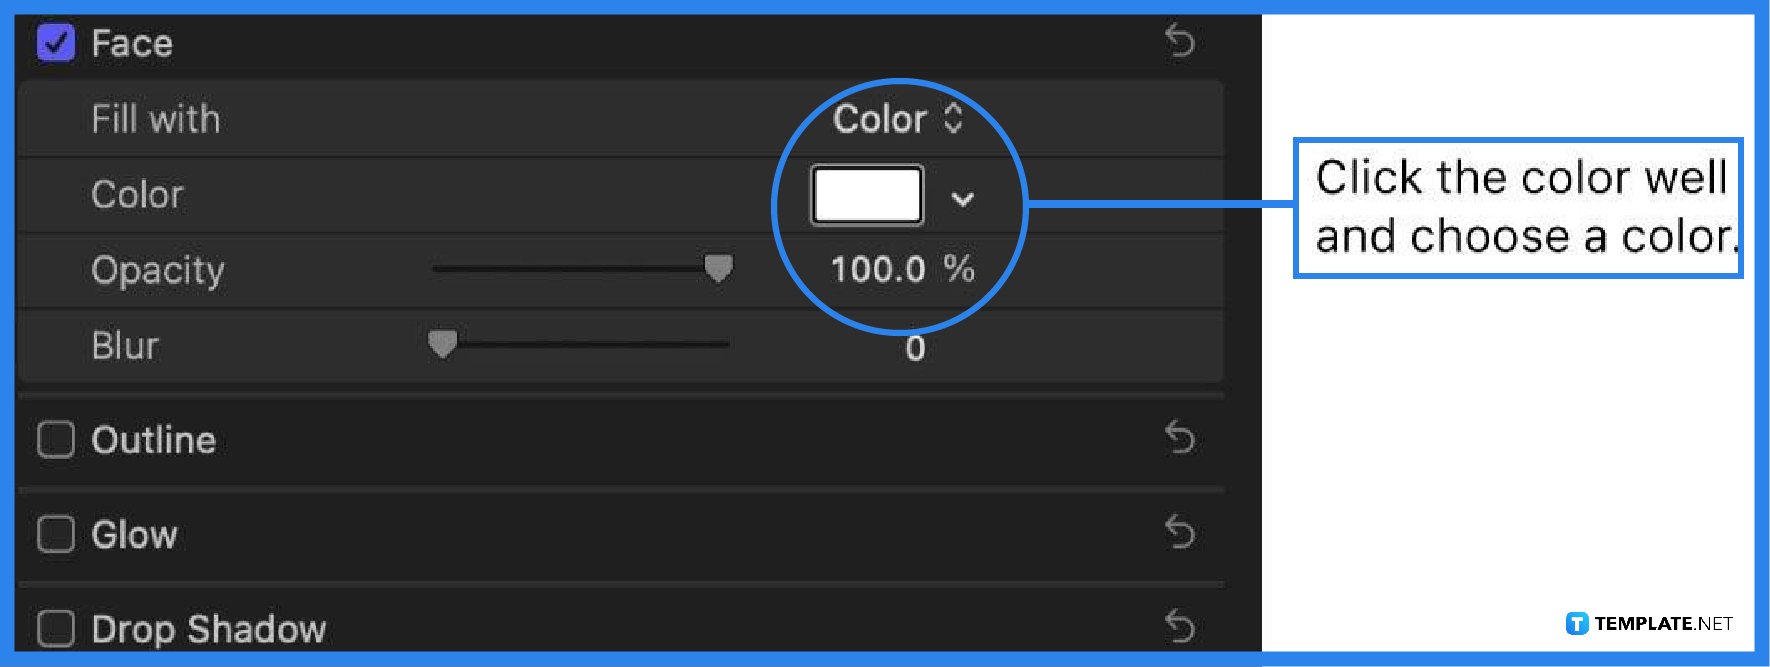
The same with editing a text title, double-click the title clip in the timeline to make it appear in the viewer and automatically select the text in the title clip’s first text object. Then, click the Text Button located at the top of the inspector; if the inspector isn’t shown, you can click the Inspector button on the toolbar’s right side. On the Face section, click the color well and choose a color for the title text. -
Step 3: Change Title Text Style
To change the title’s text style, double-click the title clip in the timeline and click the text inspector. Available settings will appear where you can adjust the font style of the text, the font size, the alignment, line spacing, and the color. Adjustments for 3D texts and for other text styles can be utilized in this Final Cut Pro option.
-
Step 4: Change Multiple Text Objects
You can edit multiple text objects in the title all at once by, first, selecting the title clip in the timeline and moving the play head over the selected title clip. Second, in the viewer, hold COMMAND while selecting the text objects you want to adjust. And, third, adjust the settings in the Text Inspector as needed.
FAQs
How to reveal the sections in the Text Inspector?
To reveal the sections in the Text Inspector, scroll down and double-click each section name to view all available controls and settings.
Why isn’t the Text Inspector showing?
The inspector isn’t automatically shown on the screen but to do so you can either press COMMAND+4 or click the inspector button on the right side of the toolbar.
How to modify a different text object in the title clip?
To modify a different text object in the same title, select the text object in the viewer of selecting it in the title clip in the timeline.
What other title adjustments can you do in Final Cut Pro?
Besides the text, style, and color, you may also adjust certain features like the title’s scale, position, and animation timing with Final Cut Pro.
What is another way to modify different text objects at once?
Simply click and drag or highlight the text objects you want to modify at once.


