How to Add/Delete a Text Box in Google Slides
You can add and delete text boxes in Google Slides on demand. The process is easy to execute. If you don’t know how to do it, don’t worry. Our short guide below will walk you through the steps.
How to Add/Delete a Text Box in Google Slides
-
Step 1: Head on to docs.google.com/presentation
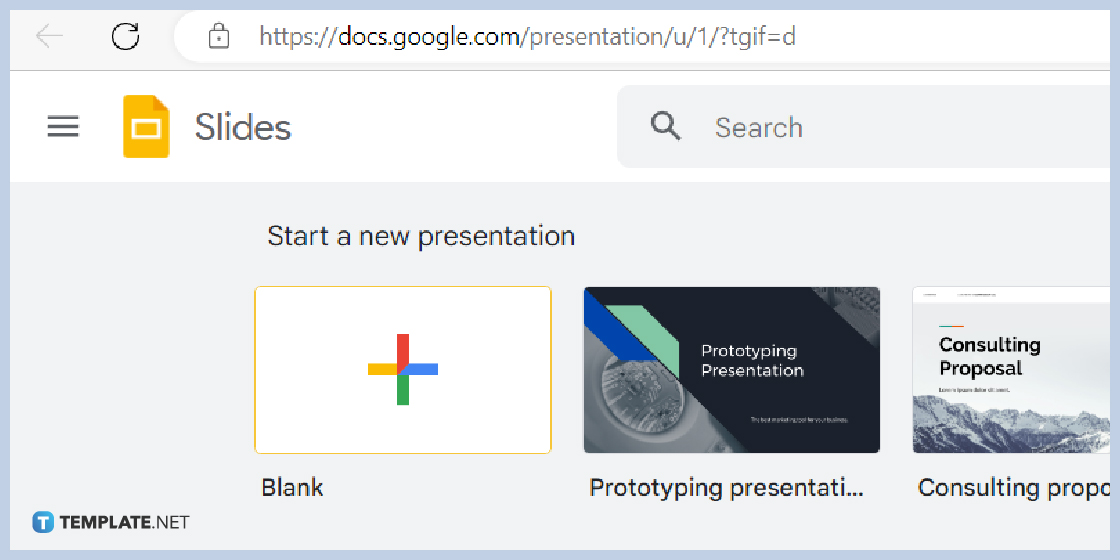
It’s best to access Google Slides using your preferred web browser. On the address bar, type docs.google.com/presentation. Once the Google Slides homepage is loaded in your browser, start a new presentation using a Google Slides Template or open a saved file>

-
Step 2: Go to Insert and Click Text Box
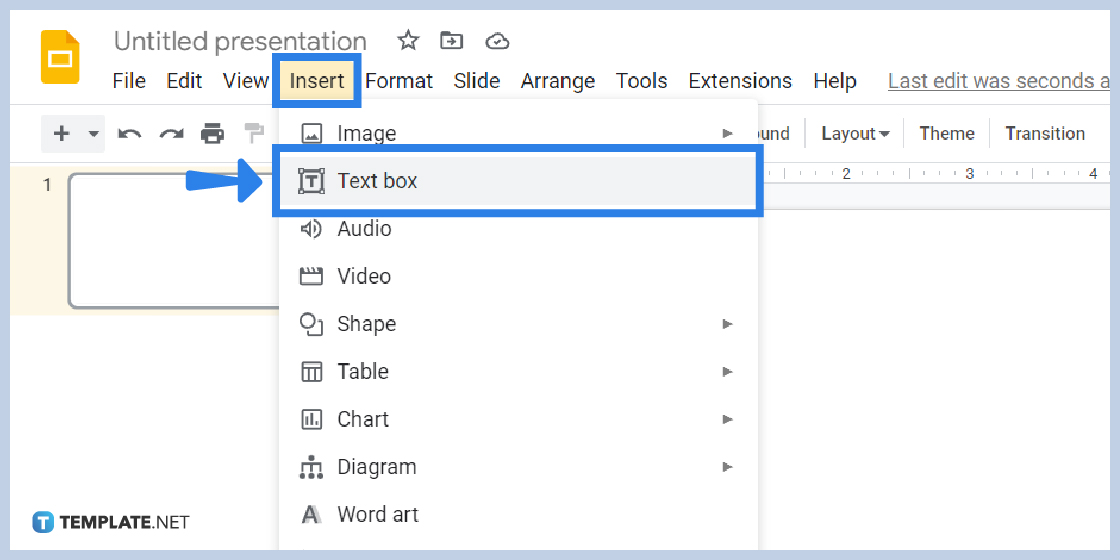
Adding a single text box is very simple. Just go to Insert on the toolbar menu. Click it to make the Insert drop-down menu appear. Then on the drop-down menu, click the Text Box option, the one with the T icon. After that, your cursor will turn into a plus (+) symbol. What that means is that you can now draw a text box on your slide. Just hold the left click button, drag your mouse, and release. Additionally, you can have multiple text boxes in one slide. After that, you can start writing, add bullet points, and make hanging indents on Google Slides if needed.
-
Step 3: Duplicate Slide to Have Same Text to Multiple Slides
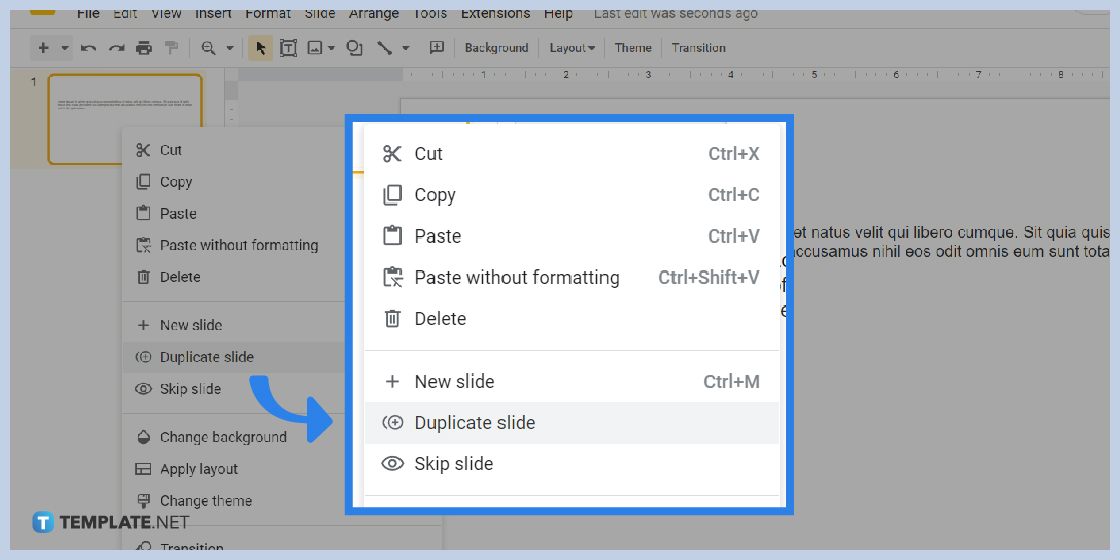
If you want to have the same text to all the slides, simply duplicate your slide containing the text box you’ve added. Simply right click on your slide on the navigation pane and a context menu will appear. In that context menu, select Duplicate Slide. Just repeat the step as many times as you need depending on the number of slides you want to add. In this process, you’re basically copying and pasting a text box to another slide.
-
Step 4: Go to Edit and Click Delete to Remove Text Box
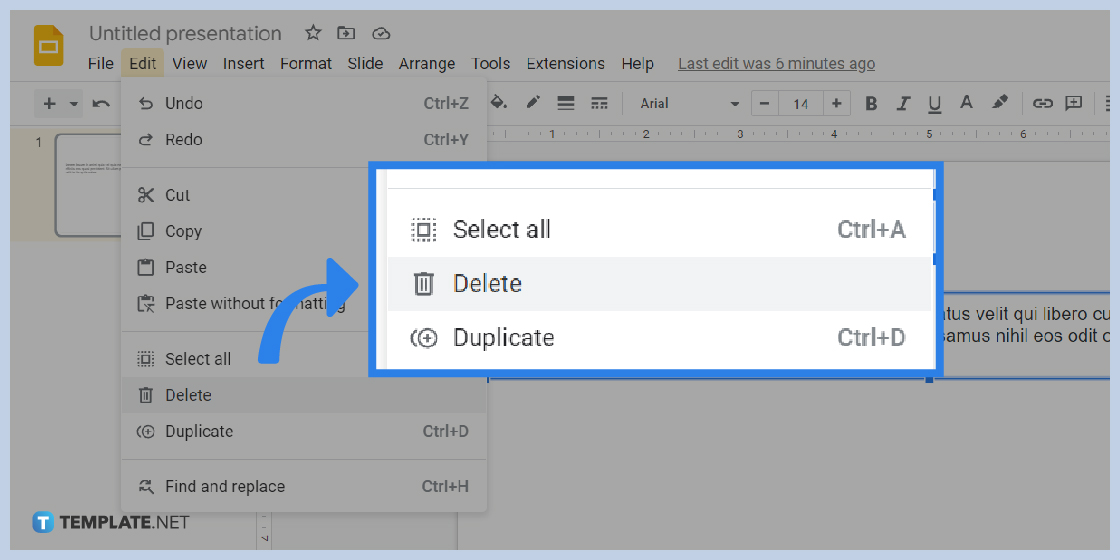
If you need to delete your text box, just go to Edit on the menu bar. Click it to make its drop-down menu appear. Once the menu is on your screen, find and select Delete. The text box will be removed immediately from your slide. You can also do this by right clicking on the text box’s border. A menu will also appear with the option to delete the text box.
In case you want to undo deleting a text box, go to Edit and select Undo or simply type Ctrl+Z on your keyboard.
Can I add new slides with text boxes in Google Slides?
Yes, you can add new slides with text boxes in Google Slides. You won’t have to start making your presentation with a blank slide. Just click the arrow-down icon beside the add new slide option on the toolbar. You can find it on the left-most side. Click the icon and a menu will appear showing slides with text boxes of different layouts.
What other things can I insert in Google Slides?
Other than text boxes, you can insert other things in Google Slides. Most notably, you can insert images, shapes, graphs, diagrams, tables, charts, lines, and word art.
Can I resize text boxes in Google Slides?
Yes, you can resize the text boxes in Google Slides. Just click and hold the left-click button on the text box’s corners (the square dots) and drag your mouse to adjust the text box size. Release the left-click button when you’ve adjusted the box’s size to the ideal dimensions.


