How to Print a Letterhead on a Mac
How to Print a Letterhead on a Mac
-
Step 1: Launch MS Word on Your Mac
Open MS Word on your Mac and open a blank new document. If you don’t have MS Word, you may also use Apple Pages.
-
Step 2: Insert Header to the Blank Document
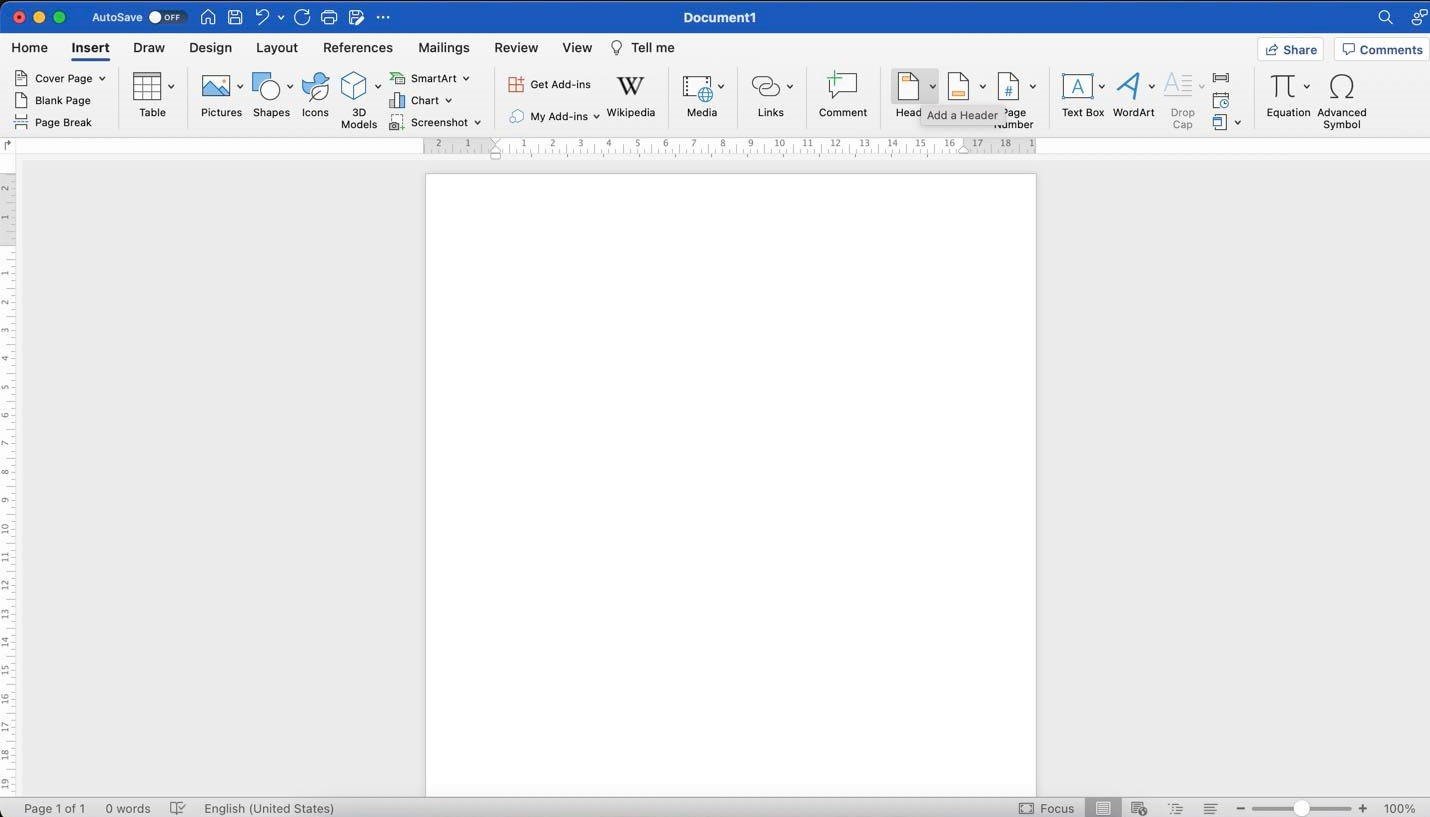
Add a header to the blank document by clicking Insert. Under Insert, select the Header option. See the image above to be guided.
-
Step 3: Create Your Custom Letterhead on the Header
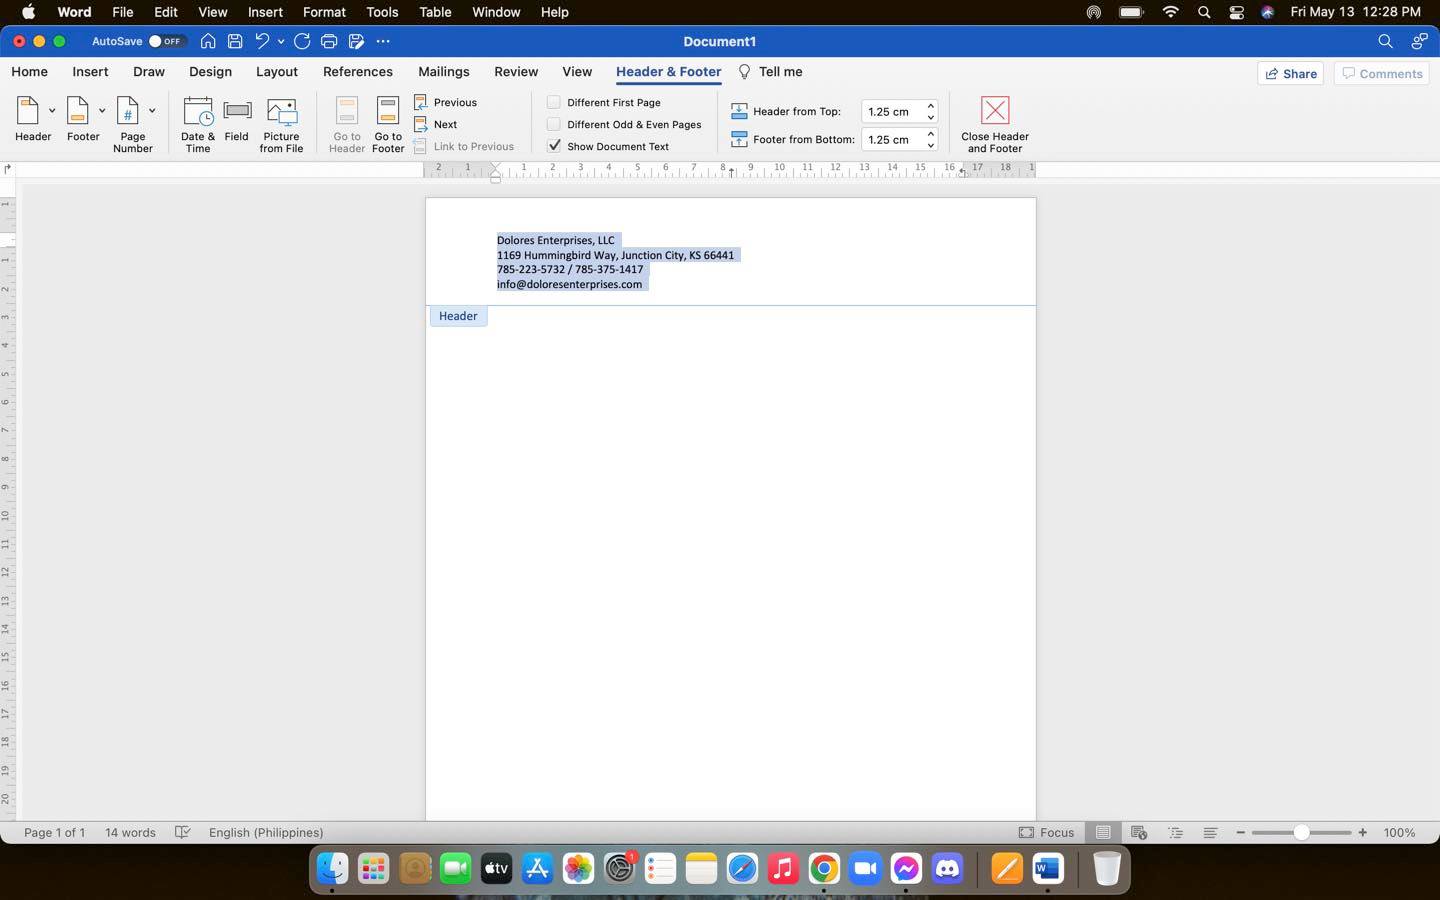
Once the header is added, make a letterhead that’s unique to your company’s identity. Type your company name, mailing address, contact numbers, and email address. Designing letterheads in Word is easy. You can use different font styles to make it look more presentable and pleasing.
-
Step 4: Go to File and Select Print
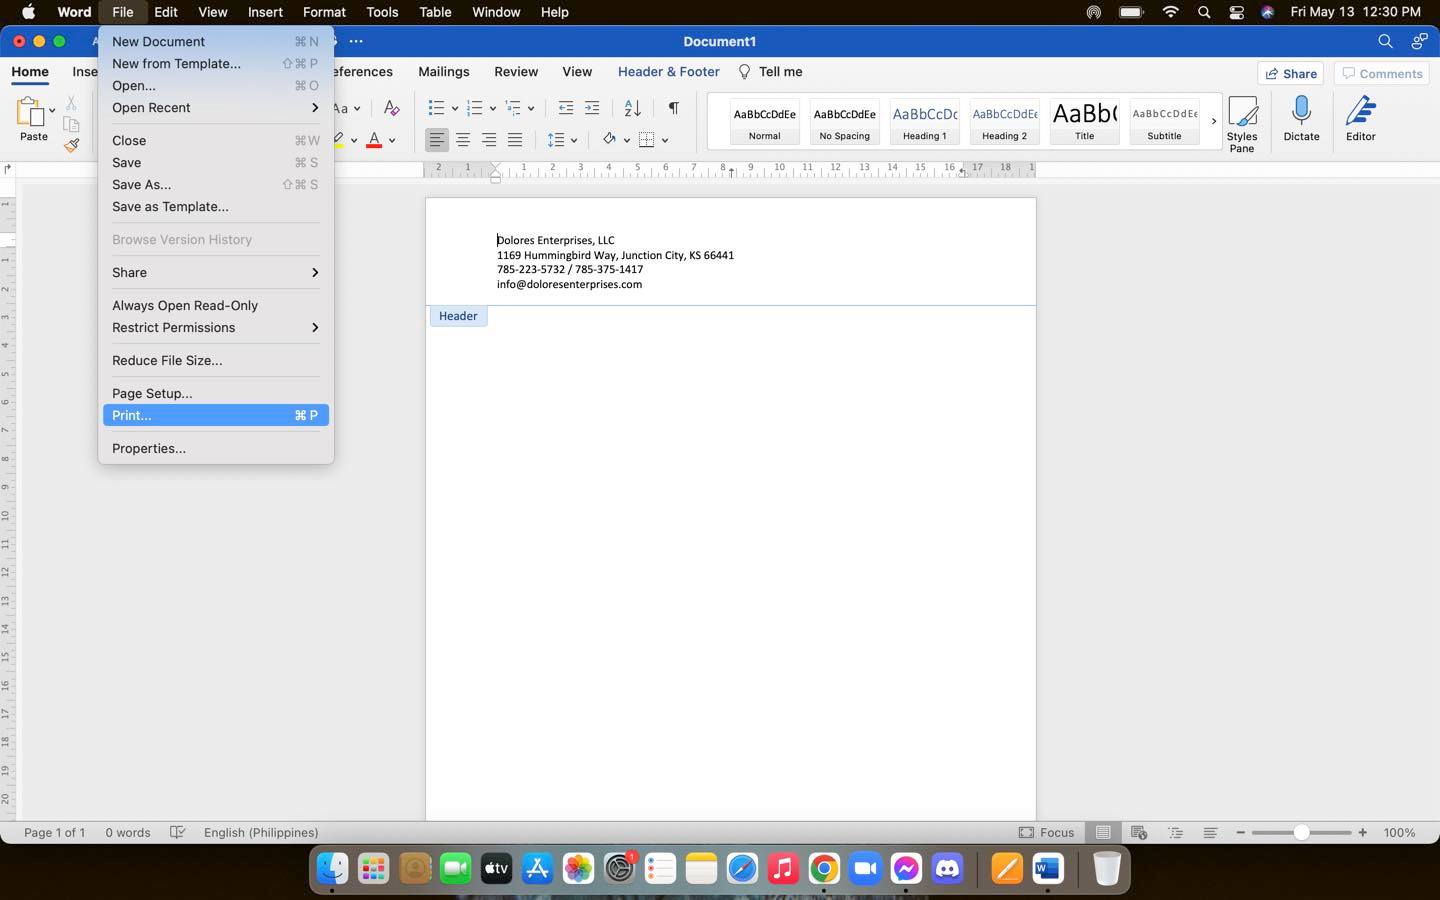
After creating your custom letterhead, you can then print it. To do that, Go to File and select Print or simply use the Command+P keyboard shortcut.
-
Step 5: Choose or Add a Printer
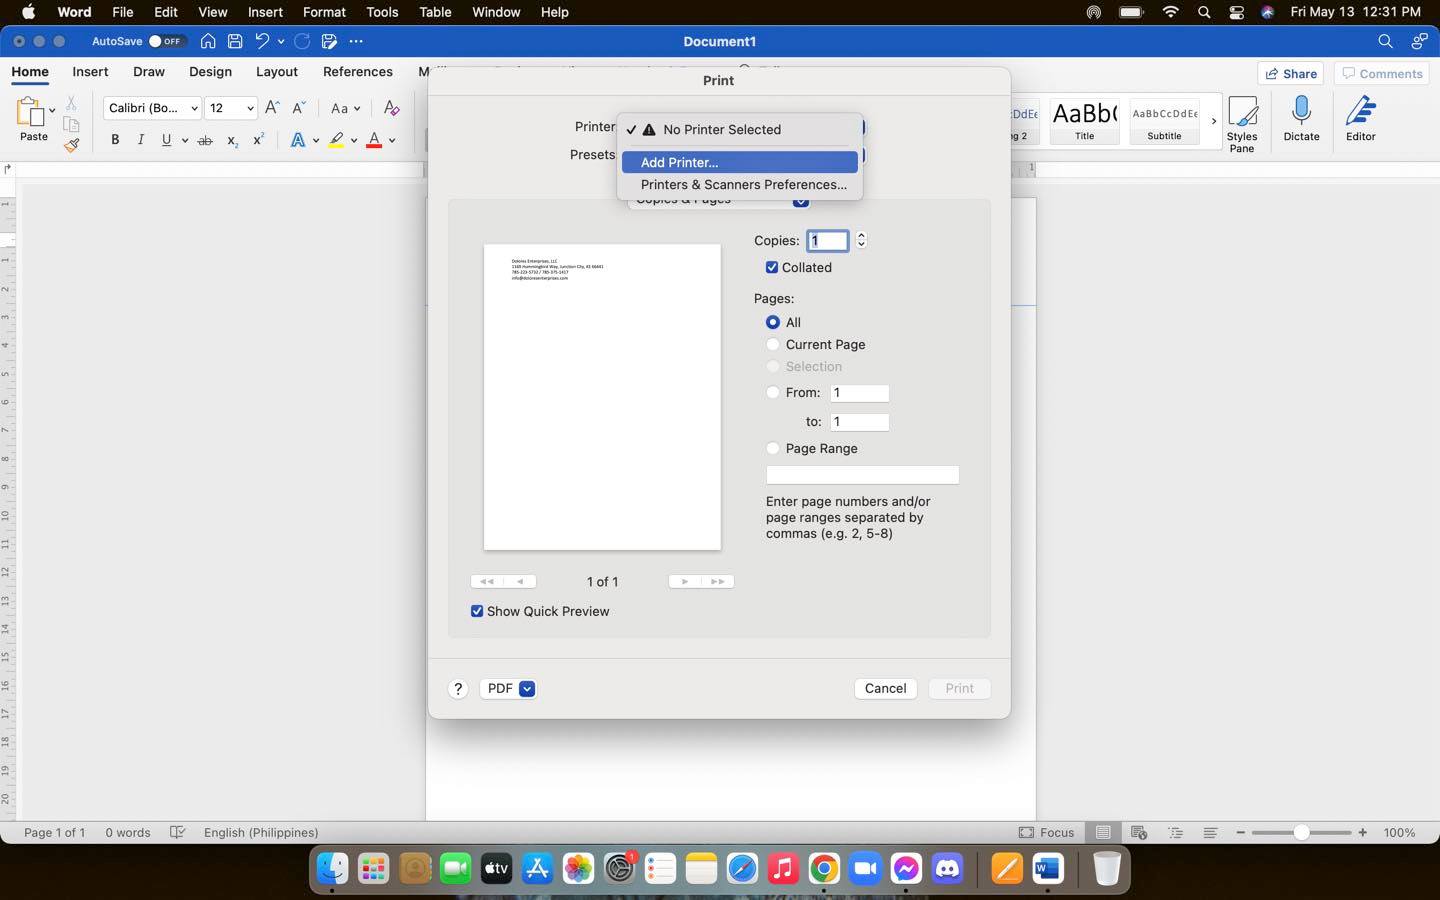
On the Print panel, indicate how many copies you want and do some minor configurations if needed. After that, choose or add a printer if none is set up. Make sure that your printer is connected to your Mac.
-
Step 6: Click Print
Once everything is set up and your printer is hooked, click Print. Tangible copies of your letterhead will be in your hands in just a minute.
What is the best type of paper for printing?
The best type of paper for printing is A4 paper. It measures 210mm x 297mm, has excellent quality, and is considered ideal for practically any type of printing job.
Are there letterhead printing services?
Yes, there are businesses that offer letterhead printing services. There might be several of them in your area. Check Google Maps for the nearest store.
Should I use templates in making letterheads?
Yes, you should consider using templates in making your letterheads. They’re inexpensive and some are free to download. With their help, you’ll have unique, elegant, and professional-quality letterheads in no time.


