Photoshop CC Tutorial : Make a Repeat Pattern
Today I am going to show you an easy way to create a repeat pattern on Photoshop CC. It involves creating an artwork tile that will then be repeated seamlessly. This kind of illustration approach is good for apparel designs, packaging, desktop wallpaper and real life wallpaper too! It can be as complex or as subtle as you want.( Using Textures to Create a Retro Look )
1. Document Setup
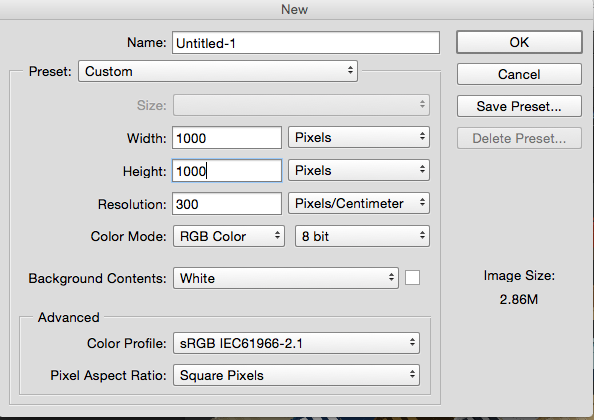
First of all set up a new document. The size of this will determine how big your repeat pattern is going to be so be aware of how big you need it at this point.
If its going to be printed out big you will probably have to go bigger than my set up but this is good as an example. Whatever size you end up going with make sure it is a square. For example purposes I’m going for 1000px x 1000px in RGB (for web, CMYK is for print) and 300dpi. (Web generally only requires 72 dpi but I may want to print this later so I go for the standard print dpi of 300.)
 2. Dragging The layers into New Document
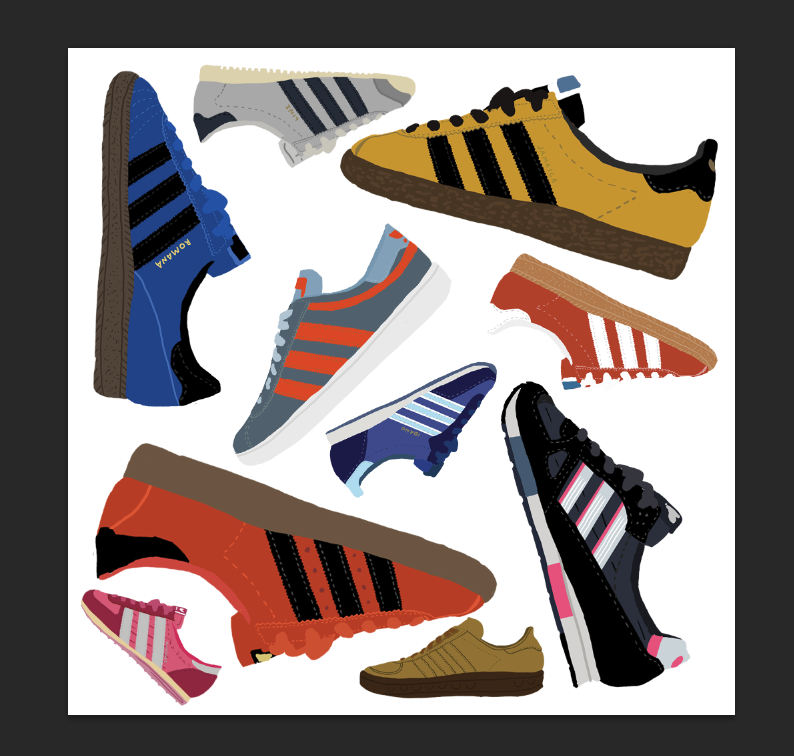
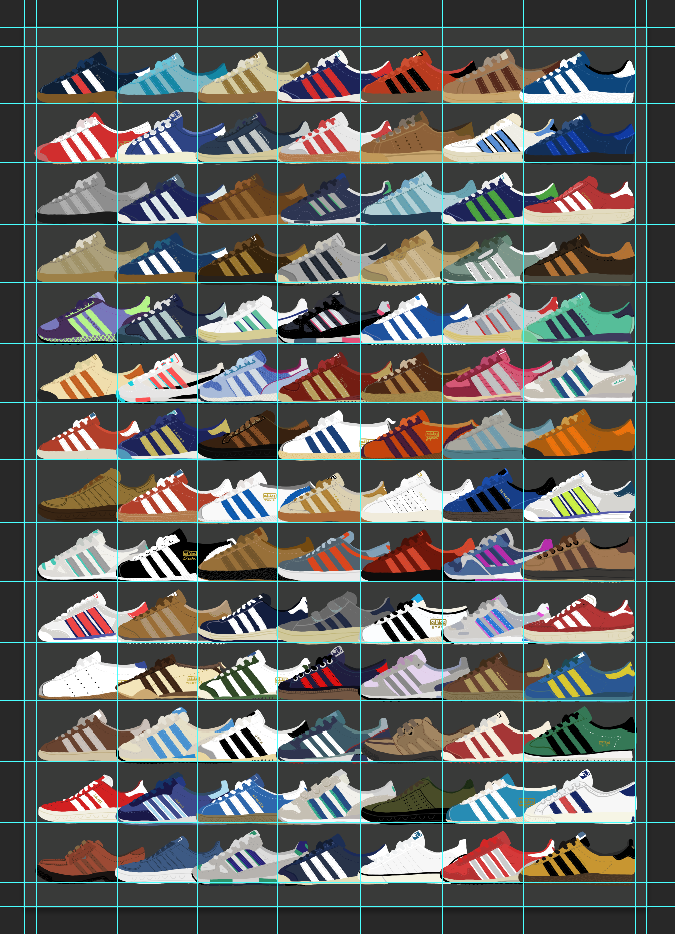
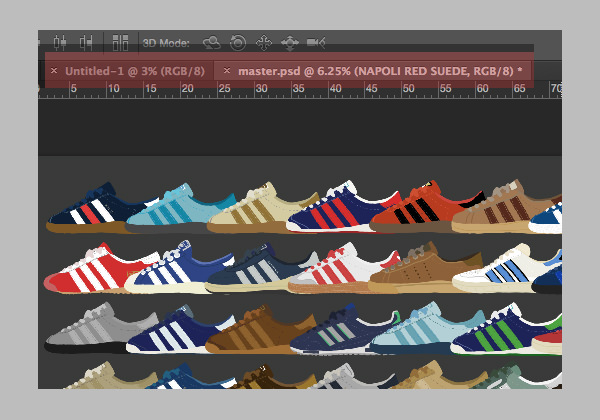
Now open a file I had already previously made. It’s a poster of loads of adidas trainers. I want to create a repeat pattern out of some of the shoes so I’m going to be dragging layers from this document into my new tile document.
 3. Dragging from the ‘Master’ Document to ‘untitled-1’
In my trainers document I have decided which shoes I want to drag across so I press ‘V’ to select my arrow tool. Now in the layer panel, select the layer you wish to drag then hover your curser back over the document (away from the layers panel) click and drag to the top where your tab menu is and drop it into your tile document. See the red highlight in the image below. I am dragging from the ‘master’ document to ‘untitled-1’
 4. Re-size and Re-arrangement of all The Layers
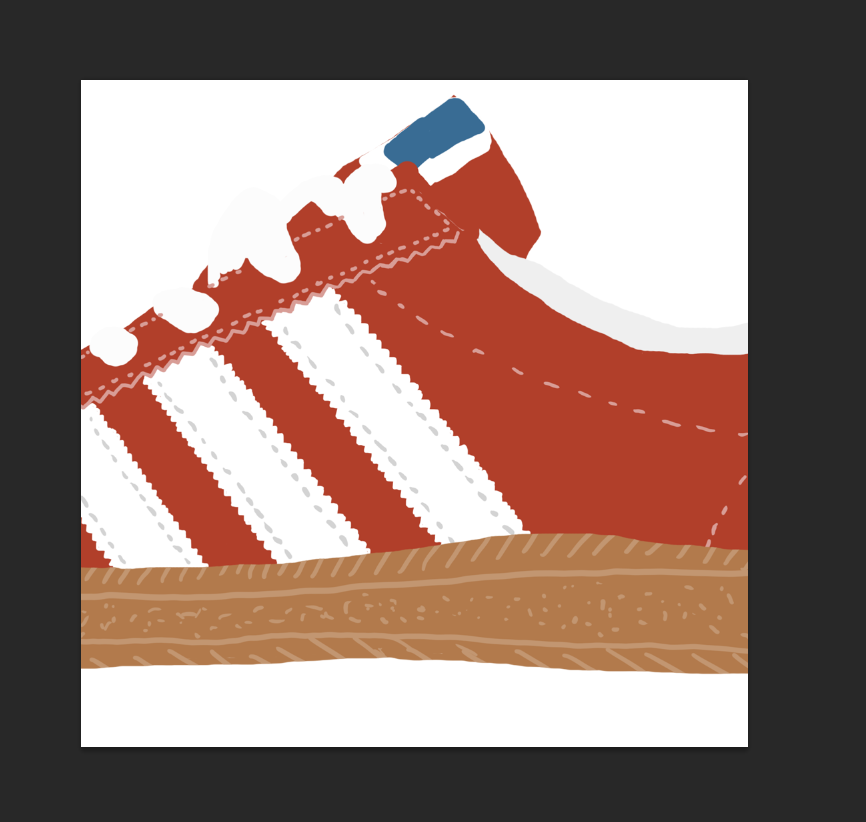
Now got my first layer in the new tile document and we have run into a problem right away. It’s way too big! We are going to have to re-size and re-arrange all of the layers we drag in anyway so its handy to know the quick way to do it!
 5. Layer Transformation
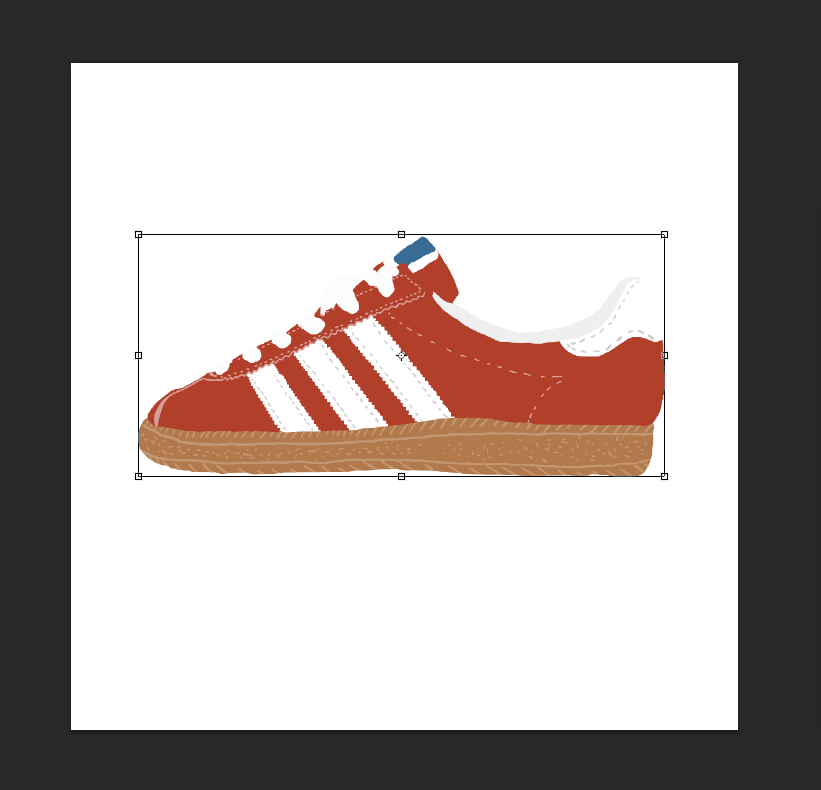
If you activate the layer you want to reshape (in the layers panel, just click on it) and then press CMD+T (CTR+T on windows) and bounding box should appear. This is the shortcut to transform (hence the T). Like most boxes on Photoshop, if you hold down the shift key when resizing from the corners it will keep the proportions and not warp the image. Once you have your desired size click enter to exit from the transform box and commit to your size. Remember; if you make your layer too small and try and make it big later down the line it will be all pixelated and you will have to re-drag the layer from the previous document again. If you hit enter too early or the image becomes warped just hit CMD+Z (CTRL+Z) to go back a step. (Fabric Patterns)
 6. Repeating the Previous Steps to Get Some More Layers
Now I’ve got the hang of the transform box I’m going to repeat the previous steps a few more time and get some more layers to play with in my tile document
 7. Arranging All The Layers
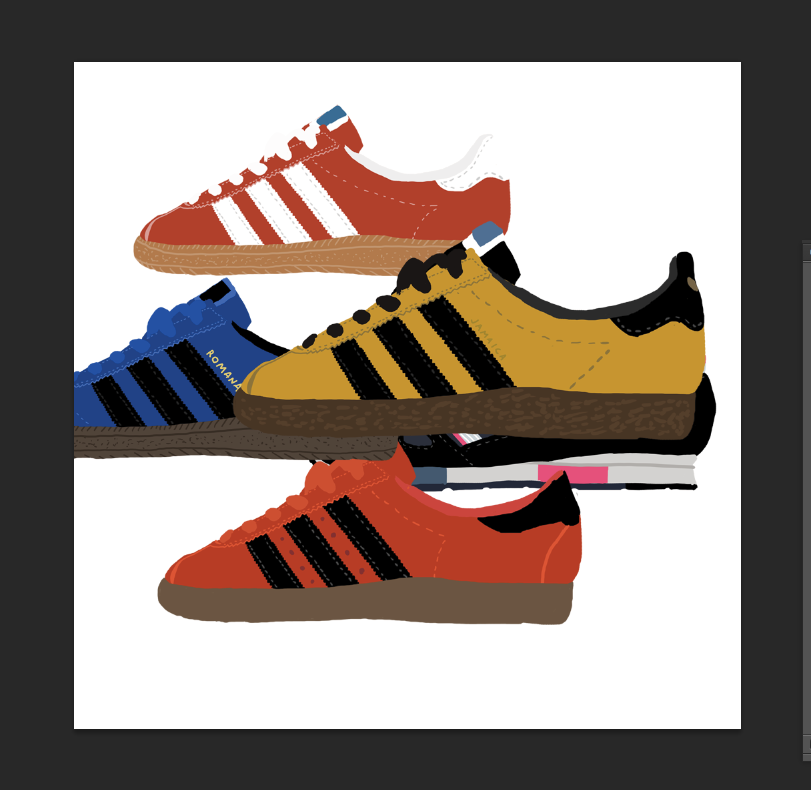
Ive just dragged the layers in, now its time to arrange. Bear im mind that repeat patterns might be seen from all different sorts of angles when they are printed for their designated project. So arranging them from all angles (upside down, sideways, etc.) will always give a better result.
What you want to do is arrange them around the document but make sure no part of any layer touches the sides! Also experiment with size. You may need to drag more layers in from your other document too.
8. Selecting and Changing the Background Color
Now ive got my trainers arranged I’m going to change the colour of my background. I want it to match the background on my other document. A dark grey. So I’m going to colour match it.
Go to your master document and click ‘B” to select the brush tool. If you hover over the colour you want and hold the alt key and an eyedropper symbol should appear. When you click on the colour it will be transferred to your main colour in the tool bar at the bottom.
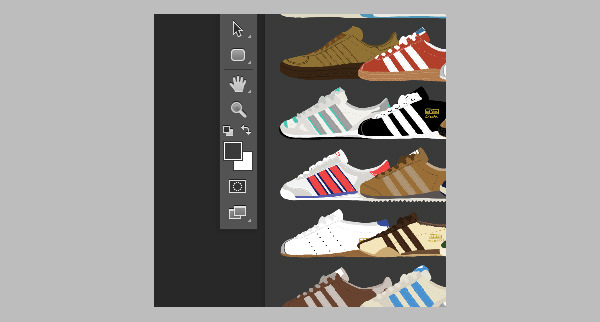 9. Save This Color for Future Reference
Now there’s a few different things you can do if you want to save this colour for later. One of the easiest methods is to go to the menu at the top and click WINDOW>SWATCHES.
Once this window is open you will see loads of little blocks of colour.
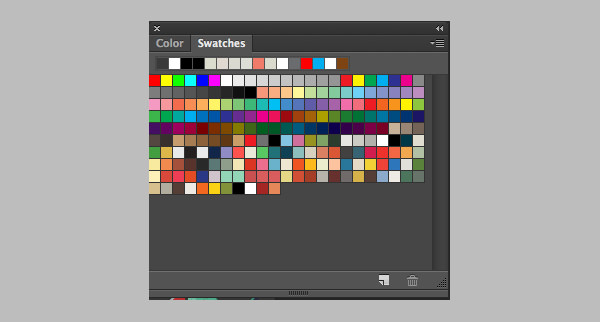 10. Adding your Color to Swatches
If you click in the window but away from the colour swatches (in the dark grey area) your colour will be saved and added to the bottom of the swatches, a window will appear asking you if you want to name your selection. This is really handy for selecting when your working with a number of colours.
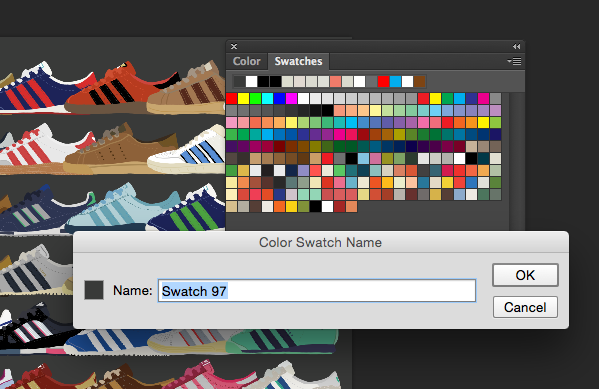 11- Right, lets go back to our tile document. If you go to your background layer in the layers panel you will see it has a lock on it to the right hand side. This means you pretty much can’t do anything with this layer!
12. Changing the Background Color
Now if you click on the little FX button at the bottom of the layers panel, just underneath your newly created layer, and select ‘colour overlay’ from the dropdown menu, a new window should appear.
Click on the little colour box to the right of ‘blend mode’ and another colour window will appear. Now click your saved colour in your swatches panel and click ‘ok’ on both boxes, your background colour should have changed. NOTE; to turn off any fx click the little eyeball symbol underneath the layer in the layers panel.
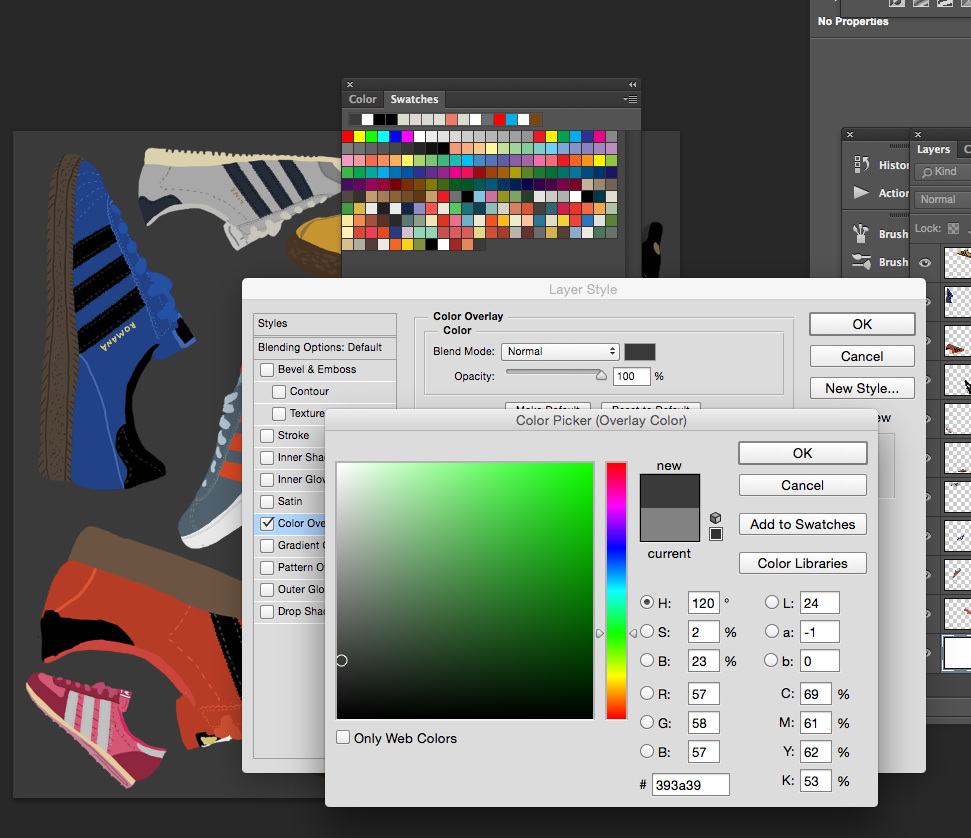 13. Duplicating the Image
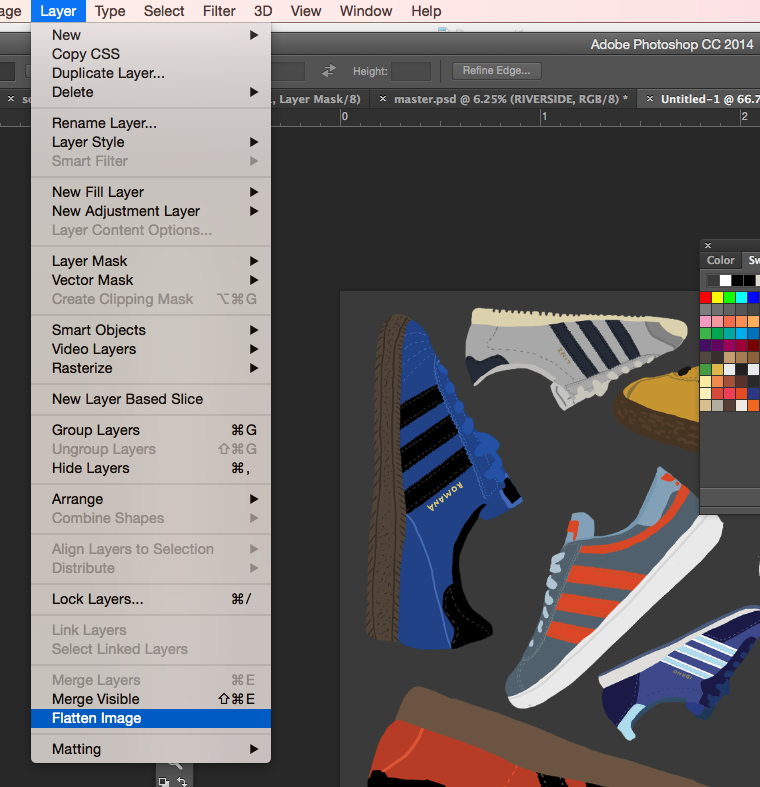
Now I’m pretty much done for this section. Go to layer in the menu at the top, and right down at the bottom there’s an option to ‘flatten image’. Click this to flatten the document. NOTE; it might be worth duplicating the image at this point (IMAGE>DUPLICATE) as flattening is a very destructive and if anything goes wrong it will be unlikely that you are able to recover it back to this point. So It’s always handy to have a backup. ( I normally wouldn’t recommend flattening at a mid way point of a project but this one needs flattening at different stages so is an exception to the rule)
 14. Dividing Layers into Four Quarters by Using Rulers
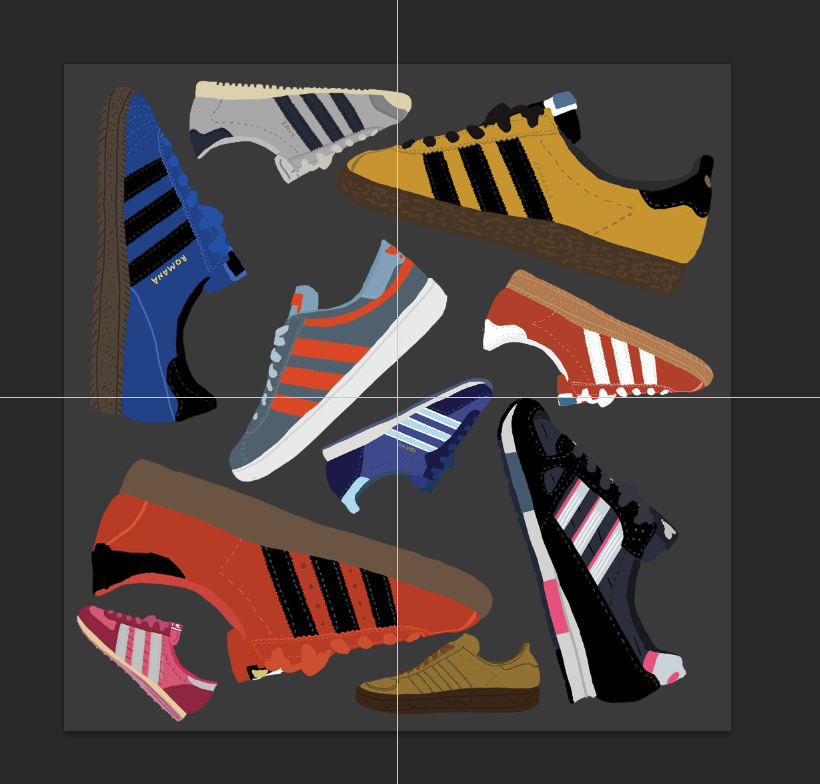
All your layers will now be flattened. We now need to divide it up into four quarters by using rulers. To turn on rulers click CMD+R (CTRL+R). You should now have rulers on the left and top of your document.
If you click on the ruler and drag out you will create a blue marker. I want you to drag one out from each side and drop right in the middle of your document. Forming a cross. If your snap guides are turned on Photoshop should automatically snap them to the center by default. If not you can use the rulers to measure. If you want to hide the markers at any point, just click CMD+H.
 15. Applying Marquee tool to The Layer
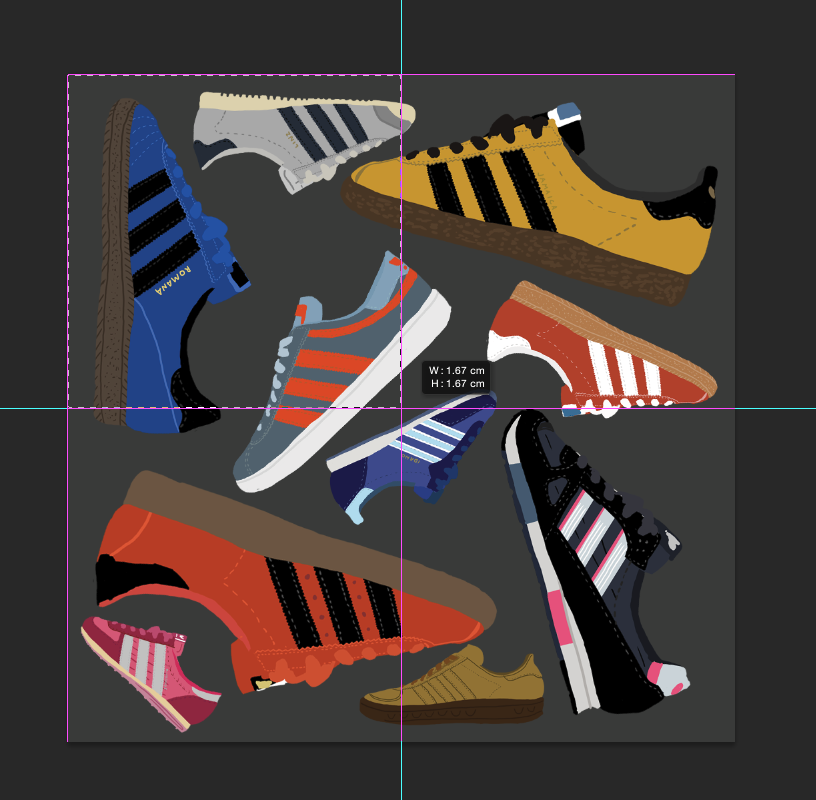
Now I want you to select your marquee tool by clicking ‘M’, and drag from the top left corner into the markers at the middle. Your selection will snap to the guides you have created.
 16. Create a New Layer from Your Selection
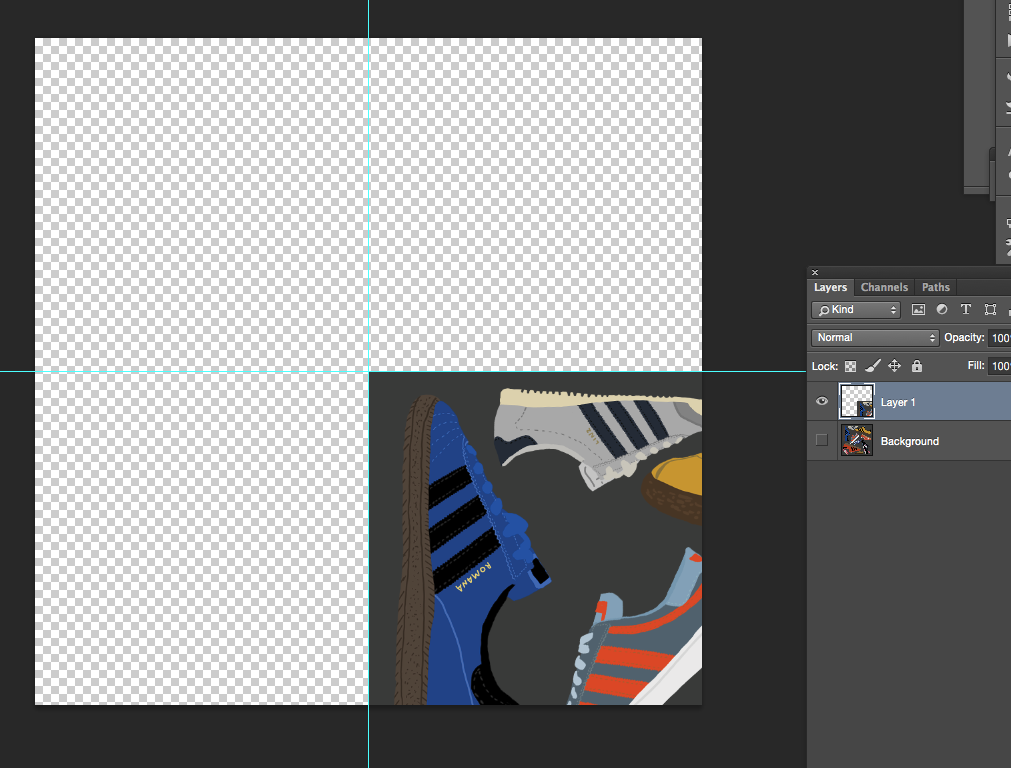
Now click CMD+J, this will create a new layer from your selection. Turn your background layer off and drag the new square from the top left corner, to the bottom right. Now turn this layer off and switch your background layer back on, make sure your background layer is active by clicking on it.
 17. Repeat the Previous Steps
Repeat the previous few steps but this time select the bottom left, CMD+J to make a layer from the selection and drag this to the top right. Basically we are swopping all the squares diagonally. Do this for the remaining two corners.
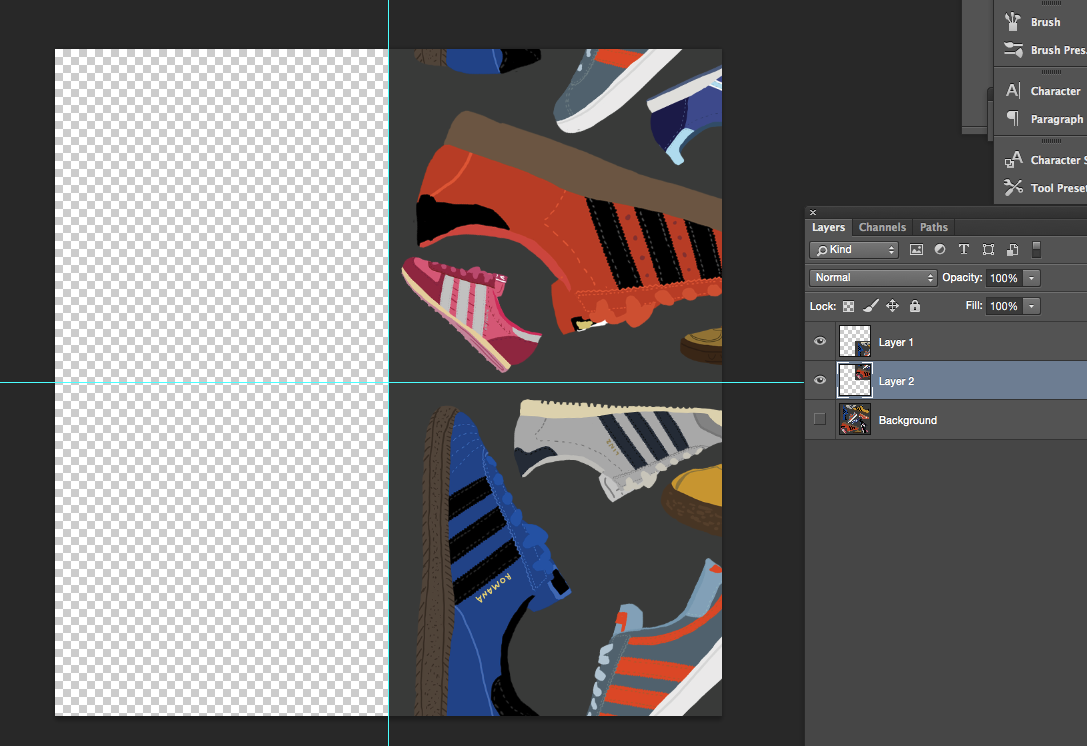 18. Flattening the Image
Once you have done this with all four corners you can go ahead and flatten the image again! That’s LAYER-FLATTEN IMAGE. My image now looks like this..
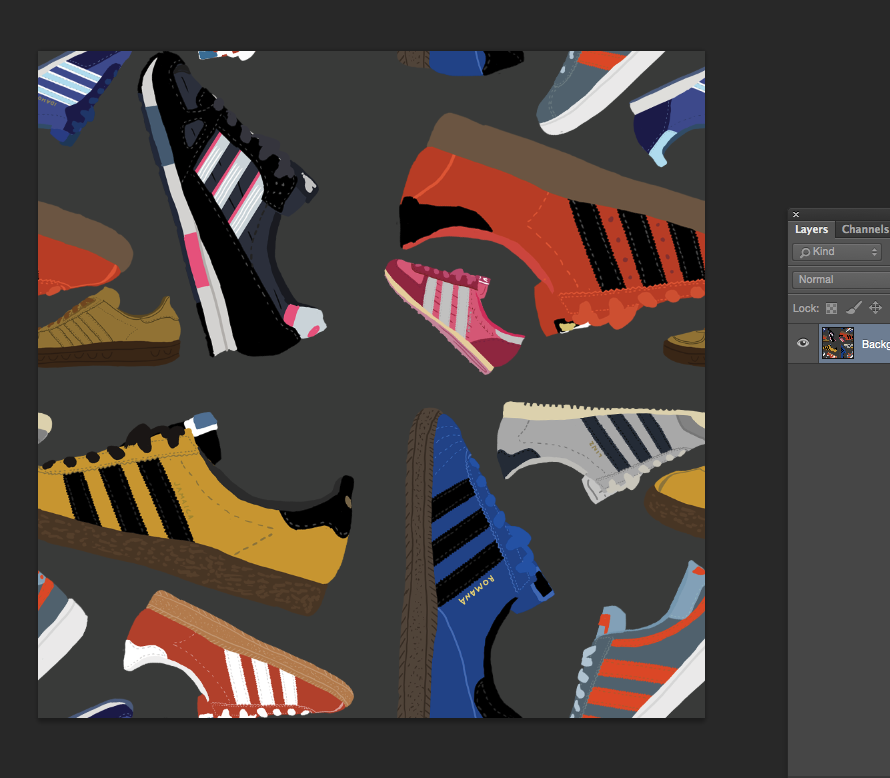 19. Filling The Gaps
The next step is to fill in the gaps! Again don’t touch the sides with the new layers you are dragging in! as you can see I’ve tried to fill in as many gaps as I can by experimenting with sizes.
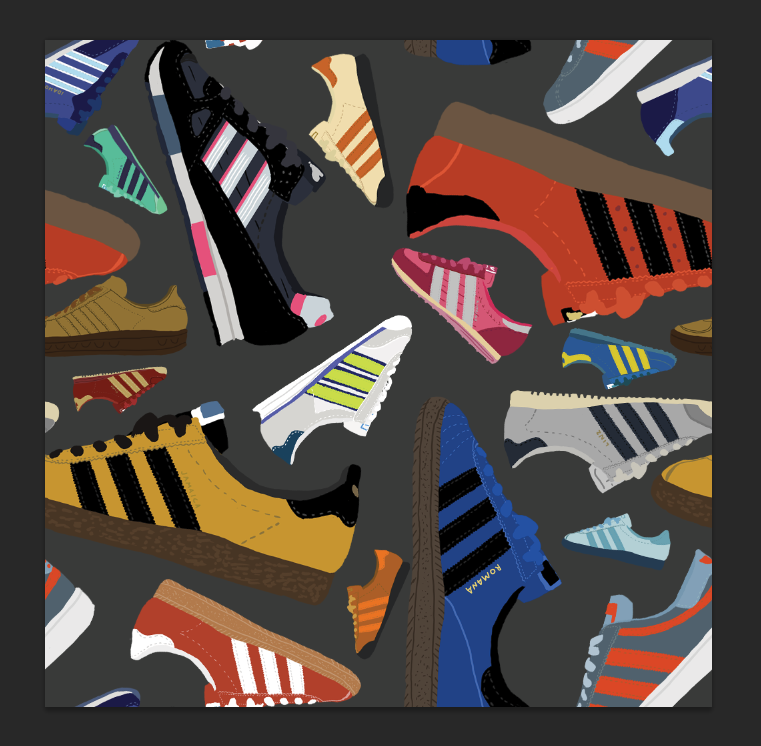 20. Flattening The Image Final Time
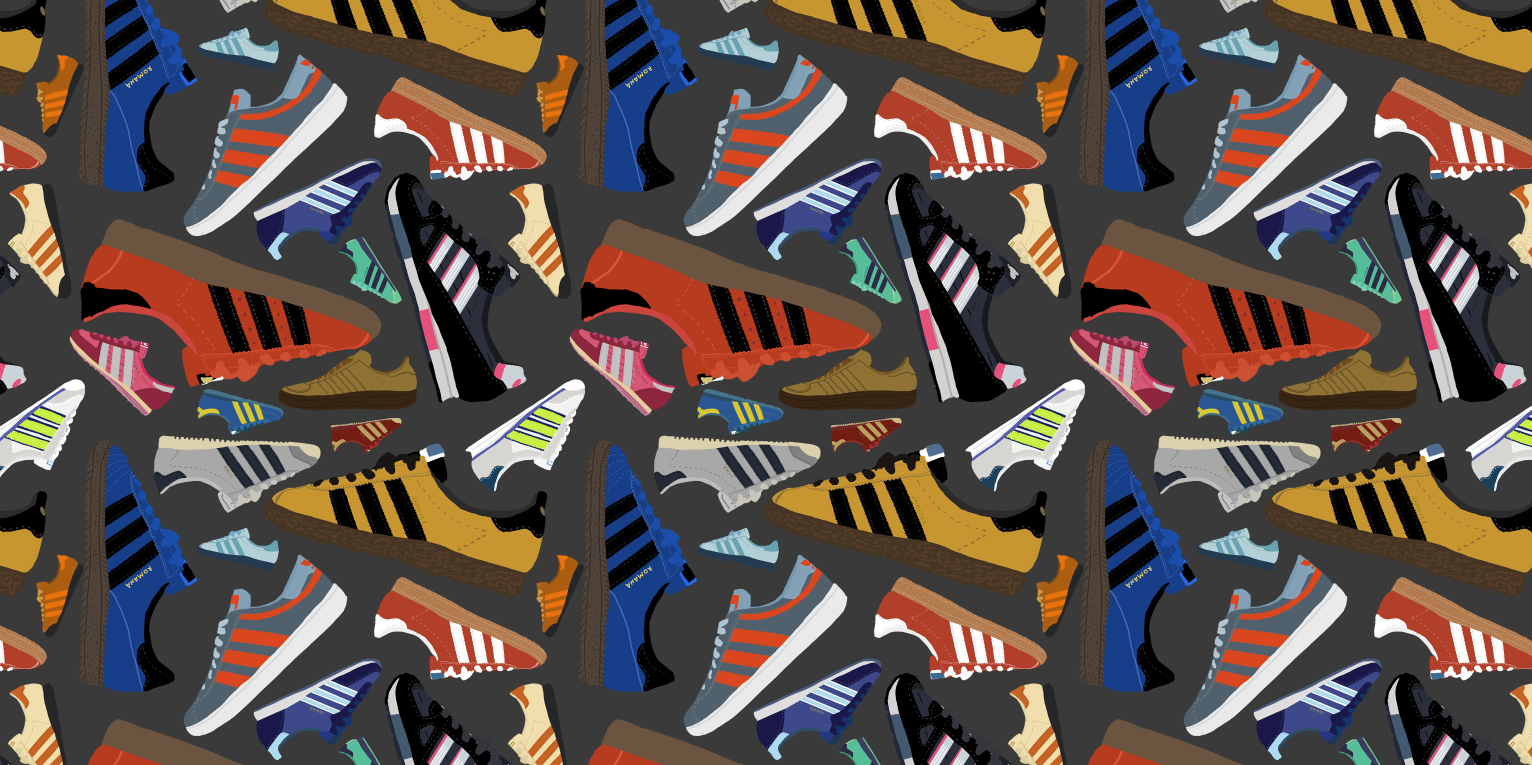
Now flatten your image for the third and final time. Select your Marquee tool (M) and drag a selection across the whole of the document. Whilst the selection is still active, go to EDIT>DEFINE PATTERN. It will give you the option to name the pattern if you wish.
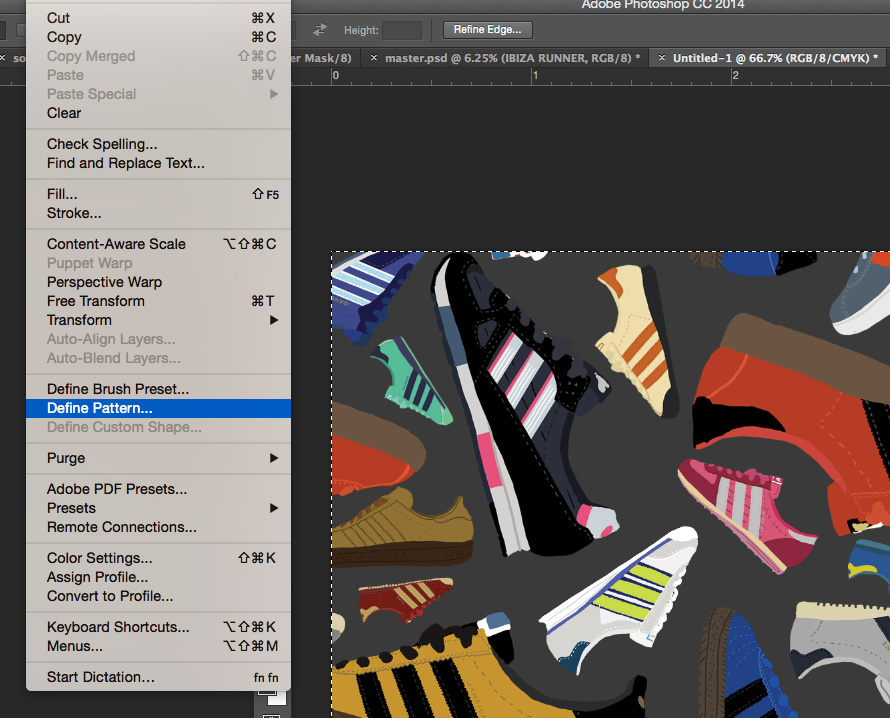 21. Pattern Selection
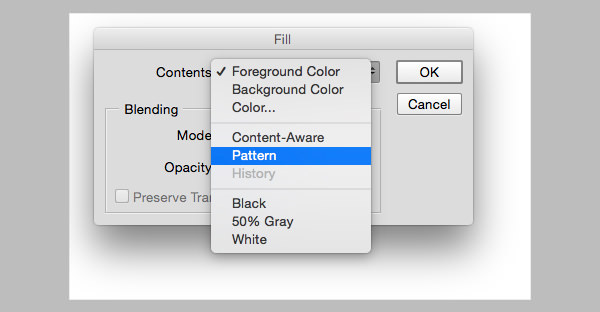
Now to test it! Create a new document, try an A4 size, make sure its bigger than your pattern tile document. Now click M and use the marquee tool to make a selection across the whole of your document. Hold shift and press F5 ( or just go to EDIT>FILL. A menu box will appear, use the drop down menu in the ‘contents’ section and select PATTERN. (Web Design Background Patterns)
 22. Selecting The Custom Pattern
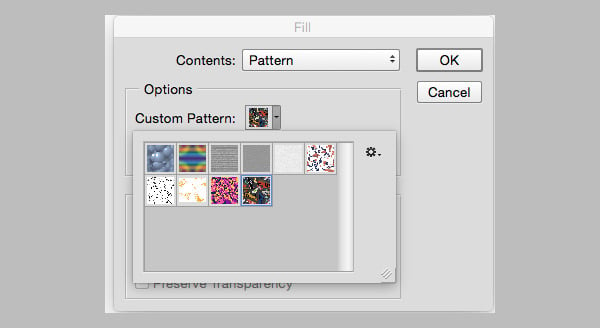
Now, in the pattern menu click on the thumbnail next to ‘custom pattern’ and in the dropdown box the pattern you have just created should be last in the line.
 23. Completed Repeat Pattern
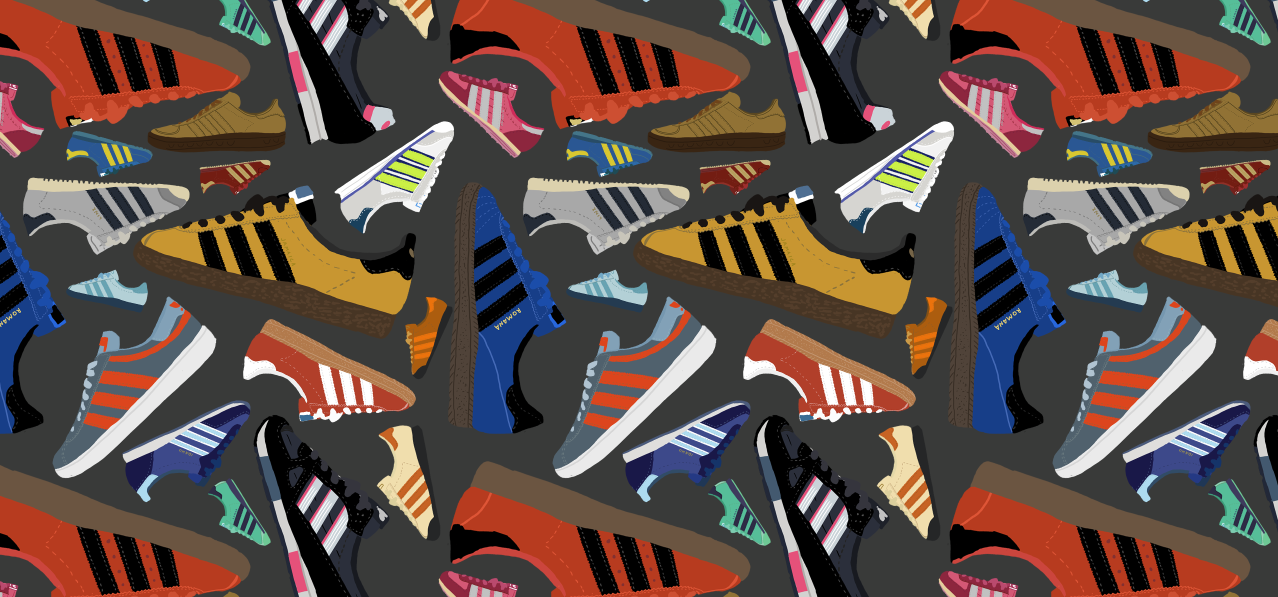
Click OK and voila! Your new document will be filled with your new repeat pattern! (Geometric Patterns)
Let me know if you have any suggestions… Please comment


