


How to Add Streaming Audio in WordPress – Tutorial
Adding a streaming audio file to your WordPress website is fairly easy if you follow the mentioned steps. Foremost, you must remember that although WP supports audio in multiple formats which include MO3 and WAV, always go for the smaller version of the file. This will make your website less cumbersome, help it load faster and keep your visitors happier. Now to upload the file you can follow any of the following methods

1. Uploading the File from your Computer
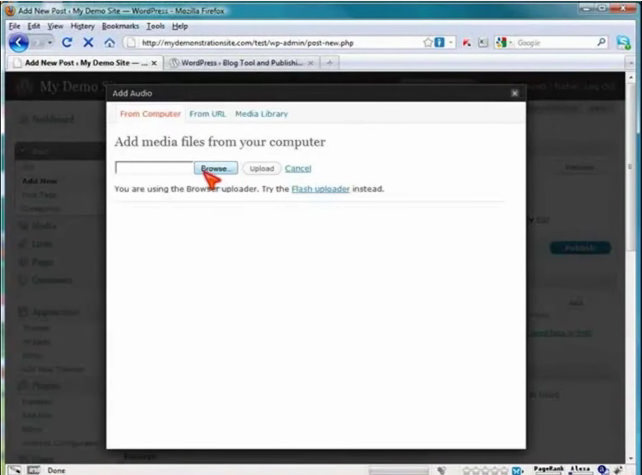
- Go to the left most panel and select the Add New option. In the Upload/Insert panel select the “Audio” option. To add files from your computer you can use the Browser Uploader or the Flash Uploader. It is always better to select the Browse option to avoid any HTTP errors.
- Select the desired file from your computer.
- Once the file is uploaded it will show in your Gallery.
- You can edit the file name; add caption and description to the file. You can choose the File URL or the Post URL option, if you want to keep your audio file downloadable for your visitors.

- And once you are done editing click on Update in the right panel.
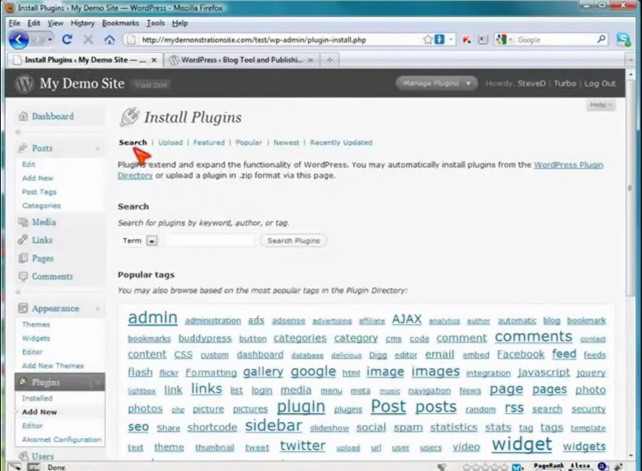
2. Or you can select a new plug-in from the WordPress Plugins directory for enabling audio streaming. To bypass multiple steps of zipping and so on, you can go to add plugins in the left most panel, search the plug-in and directly click on install. Go to your gallery, click on “Audio Player” and update your post.
Most Popular WordPress Audio Streaming Plugins
S3Bubble Amazon S3 Video And Audio Streaming With Analytics
WP Stream PlayerHTML5 Audio Player WordPress Plugin
WordPress Live Streaming Audio Player
Royal Audio Player WordPress Plugin

