![How to Add a Signature in Microsoft Forms [Templates + Examples] 2026](https://images.template.net/wp-content/uploads/2022/07/How-to-Add-a-Signature-in-Microsoft-Forms-Templates-Examples-2023-788x443.jpg)
How to Add a Signature in Microsoft Forms [Templates + Examples] 2026
Signatures found in documents establish who you are as an individual or as an organization. Aside from the fact that…
Dec 22, 2025


Sep 02, 2025
Microsoft OneNote has the capabilities to rotate and crop those images as soon as the image is inserted in the note. So, when digitally inserting images to OneNote, one must keep in mind their original orientation and size, as those images will use the format they are inserted in.

Microsoft OneNote has integrated resizing, rotating, and cropping tools into its software, allowing its users to easily manipulate their uploaded images to their liking. This allows them to fully customize the images they upload on their digital notes.
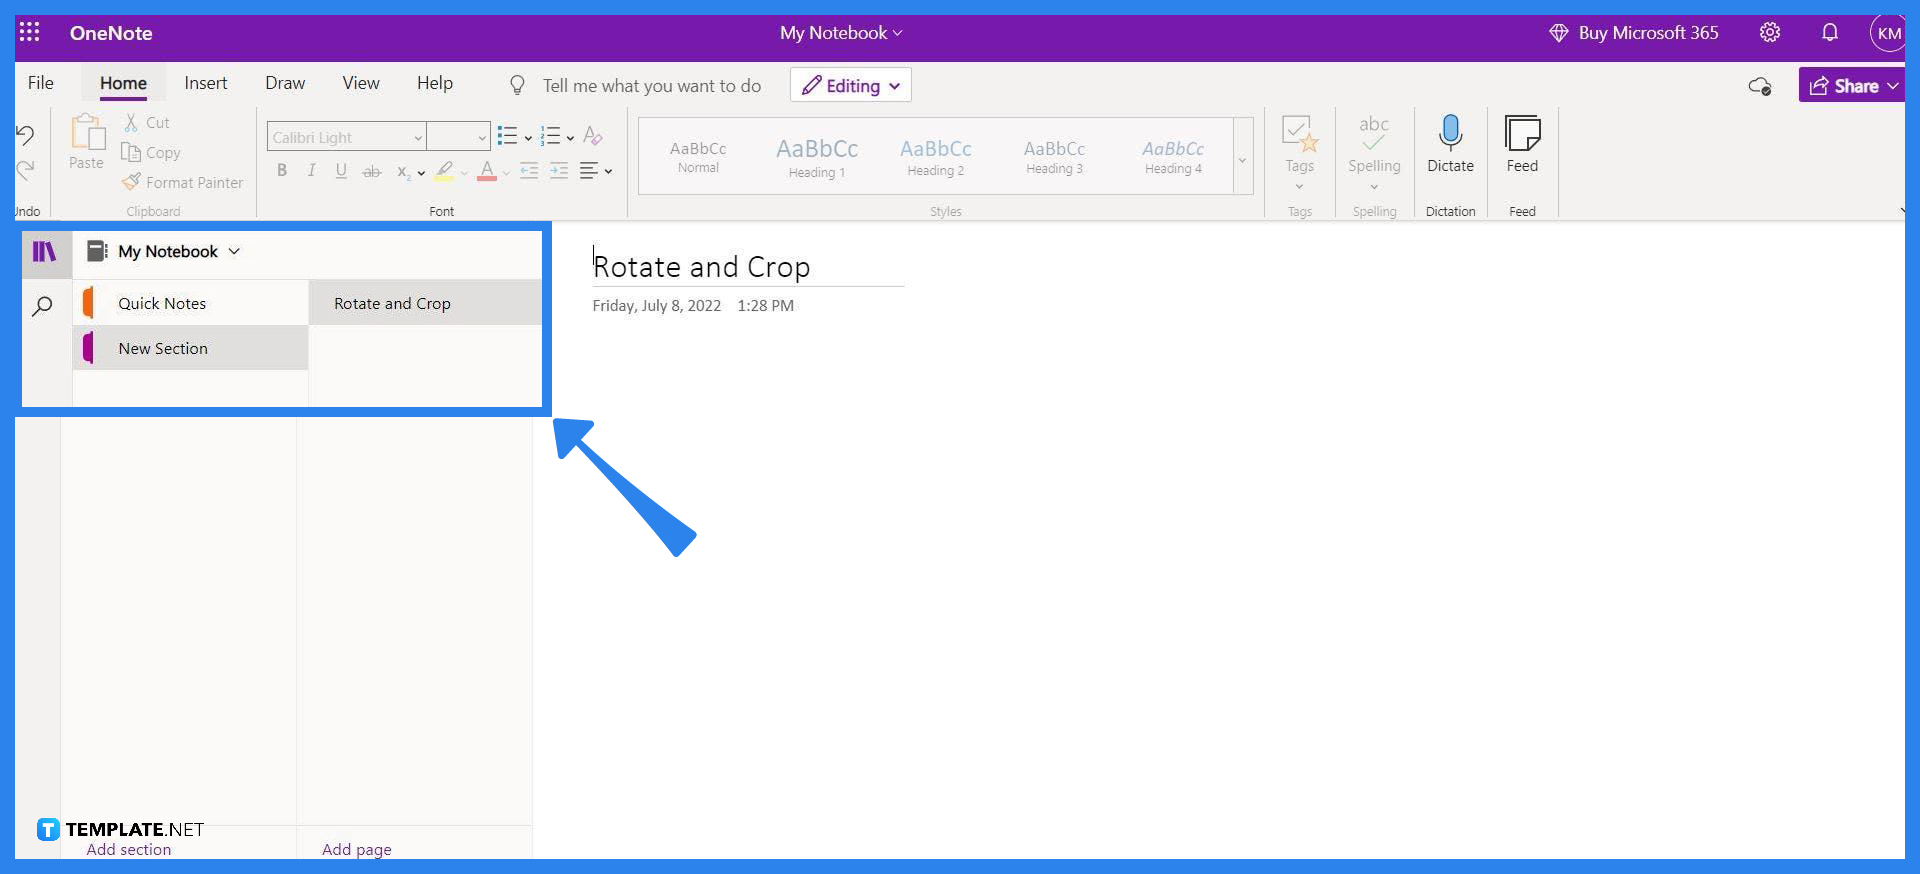
To begin, the user will have to launch or start either the desktop or the web version of Microsoft OneNote. After Microsoft OneNote opens, the user then chooses the note where they want to insert their image.
Microsoft OneNote allows users to easily insert images in intuitive and easy ways. The user may opt to drag a downloaded image to any space within the note. Alternatively, they can right-click the image, click the “Copy” button then paste it into the note by selecting the “Paste from clipboard” option which is presented to the user upon right-clicking anywhere in the note.
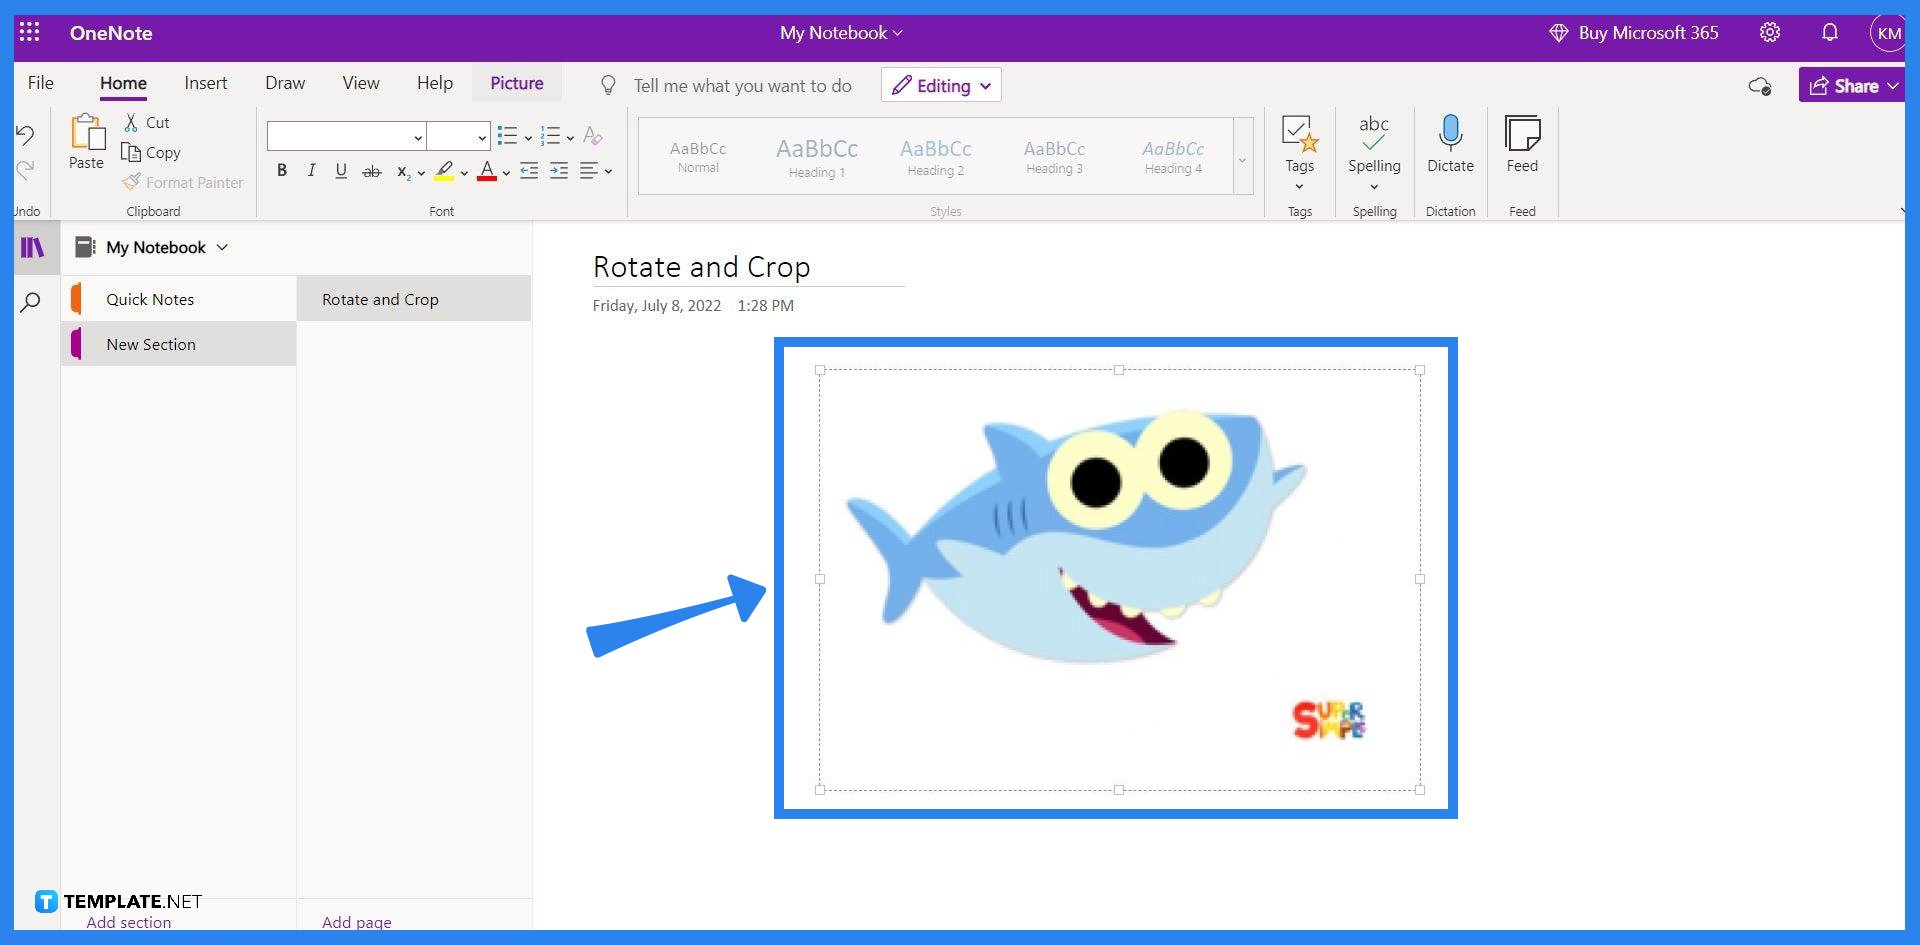
After the picture has been uploaded to the note, it can now be selected by left-clicking any part of the said picture. When the image is selected, the Picture Ribbon will appear, allowing access to different editing tools available in OneNote. This ribbon can be accessed by selecting the “Picture” button located in the top left corner of the window.

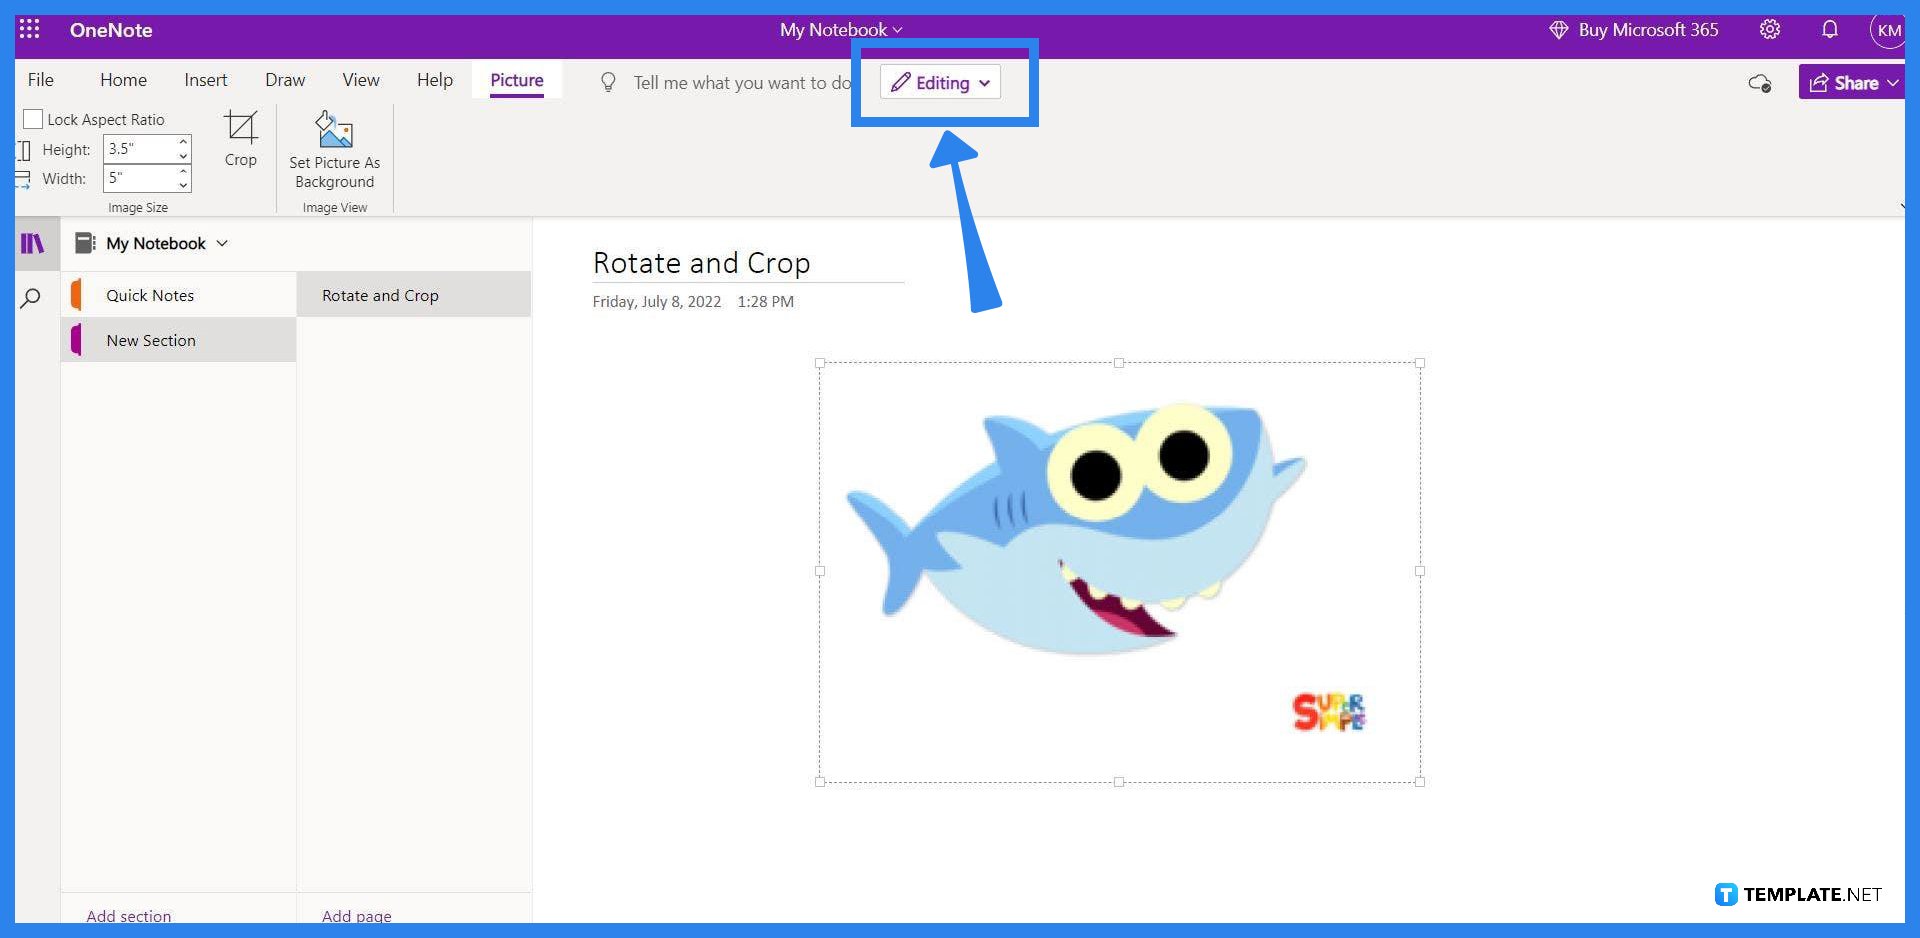
When the Picture ribbon is toggled, the toolbar below it will allow the user to pick and select the tool they would want to use. The crop tool will allow the user to crop or cut out specific parts of the image, while the rotate tool will adjust and change the overall orientation of the image. The image can also be resized in this toolbar and even be set as the background of the note it is in.

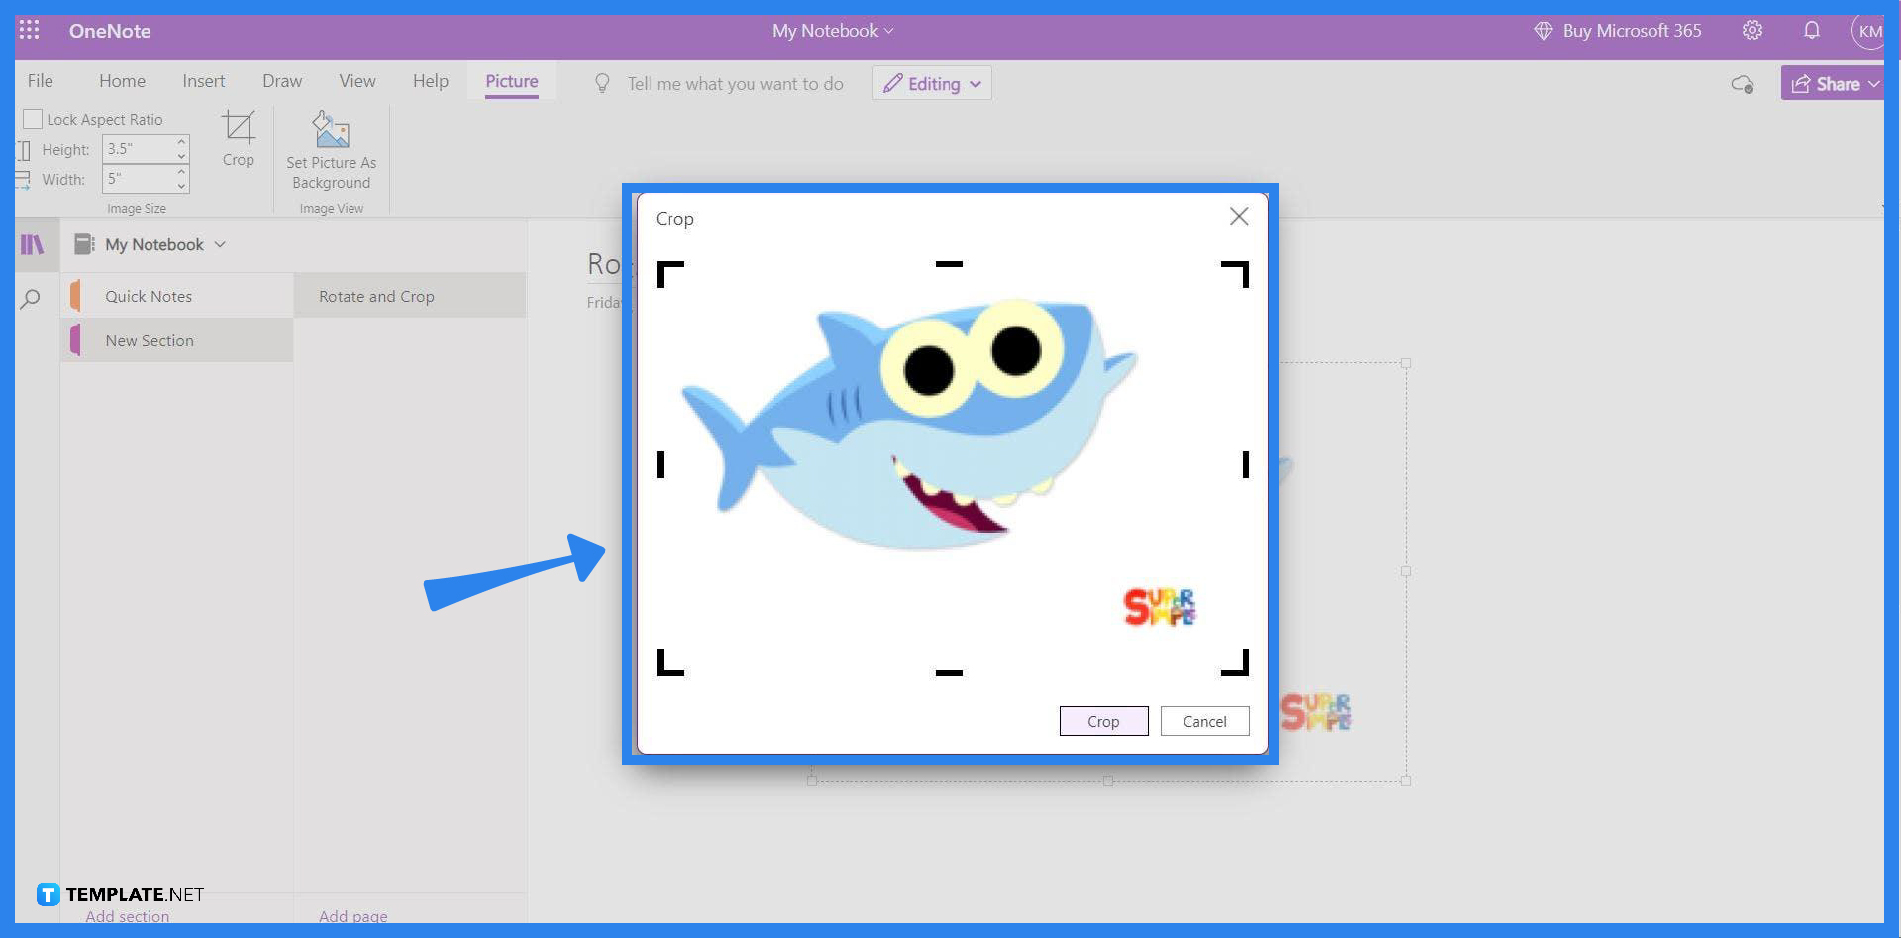
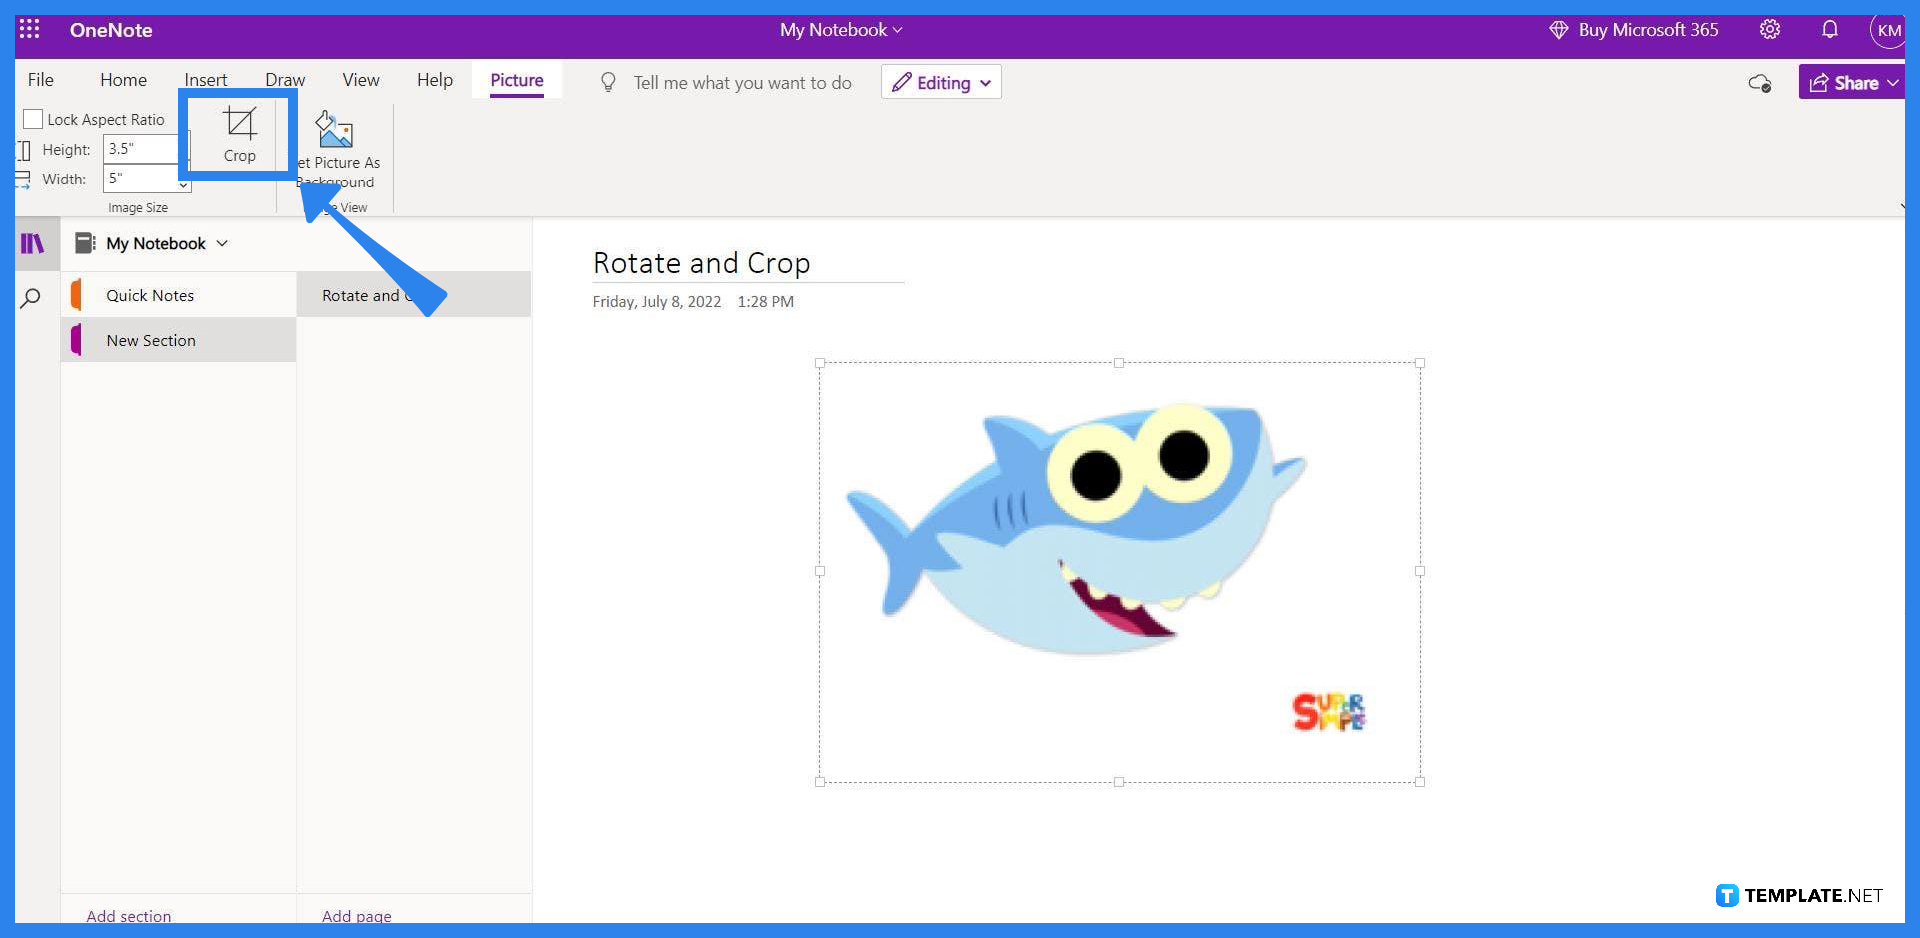
When the user clicks the “Crop” tool on the toolbar, a separate window pops out with the image in it. The black lines framing the image are used to adjust which parts of the image will be kept when the image is cut. The user can adjust the position of these lines by left-clicking the line and dragging it to any point of the image. After the frame has been adjusted to the satisfaction of the user, they must click the “Crop” button to save their image.
If the user wants to rotate the orientation of the image, they are presented with a couple of choices. These tools are: “rotate to the right” as this rotates the selected image to face right, “rotate to the left” which rotates the selected image to face the left; another is “flip horizontal” which rotates the image at a 90-degree angle, and finally, “flip vertical” which changes the orientation of the image to be upright. To use these tools the user has to first select the picture by left-clicking it and then selecting the tool they wish to use.
You can resize the image, by selecting the said image, clicking the Picture ribbon, and entering the desired width and height on the appropriate fields.
Crop a picture on the Mac version of OneNote by clicking the image, then heading to the Picture toolbar, and pressing the “Crop” button which allows the user to crop the picture.
First, you must launch the OneNote app on your iPad, upload an image to a note, press the image with your finger to select it, and then finally, press the “Crop” button located in the upper-right corner of your screen.
The note must allow the editor to have editing permission, which can be done by clicking the share button located in the upper right corner of the window and tickling the allow edit option.
The notes can be resized by clicking the View tab and choosing the “Paper Size” option, there you will be able to adjust the paper size and margins in the note.

Signatures found in documents establish who you are as an individual or as an organization. Aside from the fact that…
![How To Make/Create a Newsletter in Microsoft Outlook [Templates + Examples] 2026](https://images.template.net/wp-content/uploads/2022/07/How-to-Start-a-Newsletter-with-Microsoft-Outlook-788x443.jpg)
Newsletters enable companies and organizations to communicate relevant and helpful information to their client, prospects, and subscribers. By giving you…
![How To Make/Create a Booklet in Microsoft Publisher [Templates + Examples] 2026](https://images.template.net/wp-content/uploads/2022/08/How-To-Make_Create-a-Booklet-in-Microsoft-Publisher-788x443.png)
Booklet templates are pre-designed layouts that make it easy to create a professional-looking booklet. They typically include placeholders for text…
![How To Make/Create a Booklet in Microsoft PowerPoint [Templates + Examples] 2026](https://images.template.net/wp-content/uploads/2022/07/How-To-Make-Create-a-Booklet-in-Microsoft-PowerPoint-788x443.jpg)
Booklets can be created in Microsoft PowerPoint, which offers a design feature that allows users to display them in PPT…
![How to Automatically Fill PDF Forms Using Microsoft Excel [Templates + Examples] 2026](https://images.template.net/wp-content/uploads/2022/07/How-to-Automatically-Fill-PDF-Forms-Using-Microsoft-Excel-788x444.png)
Automatically fill PDF forms using Microsoft Excel so you won’t have to save multiple PDF forms in an Excel spreadsheet…
![How to Make/Create a Floor Plan on Microsoft Excel [Templates + Examples] 2026](https://images.template.net/wp-content/uploads/2022/07/How-to-Make-a-Floor-Plan-on-Microsoft-Excel-788x443.jpg)
Floor plans either make or break projects related to engineering and architecture. That being said, every apartment room, bedroom, living…
![How to Make/Create a Grid in Microsoft Word [Templates + Examples] 2026](https://images.template.net/wp-content/uploads/2022/07/How-to-Make_Create-a-Grid-in-Microsoft-Word-788x444.jpg)
Grids consist of a network of lines that work as graphic cues while formatting your document in Microsoft Office. If…
![How to Add More Highlight Colors to Microsoft Word [Templates + Examples] 2026](https://images.template.net/wp-content/uploads/2022/07/How-to-Add-More-Highlight-Colors-to-Microsoft-Word-Templates-Examples-2023-788x443.jpg)
Add more highlight colors to Microsoft Word so you won’t have to settle with the default shading color in marking…
![How to Make/Create a Border in Microsoft Publisher [Templates + Examples] 2026](https://images.template.net/wp-content/uploads/2022/08/How-to-MakeCreate-a-Border-in-Microsoft-Publisher-788x444.png)
Borders are graphic design elements that make a document more pleasing and stylish to look at. This can be used…