![How to Add a Signature in Microsoft Forms [Templates + Examples] 2026](https://images.template.net/wp-content/uploads/2022/07/How-to-Add-a-Signature-in-Microsoft-Forms-Templates-Examples-2023-788x443.jpg)
How to Add a Signature in Microsoft Forms [Templates + Examples] 2026
Signatures found in documents establish who you are as an individual or as an organization. Aside from the fact that…
Dec 22, 2025


Sep 02, 2025
Flattening an image means reducing the file size of the image, which will make saving and printing much easier. So, if your Microsoft Publisher publication contains multiple high-quality graphics, reducing their resolution by compressing them will improve printing performance.

Before compressing a picture, determine its size on the page first, as a picture loses detail when it is compressed in Microsoft Publisher, and lowers its quality if it is later enlarged.
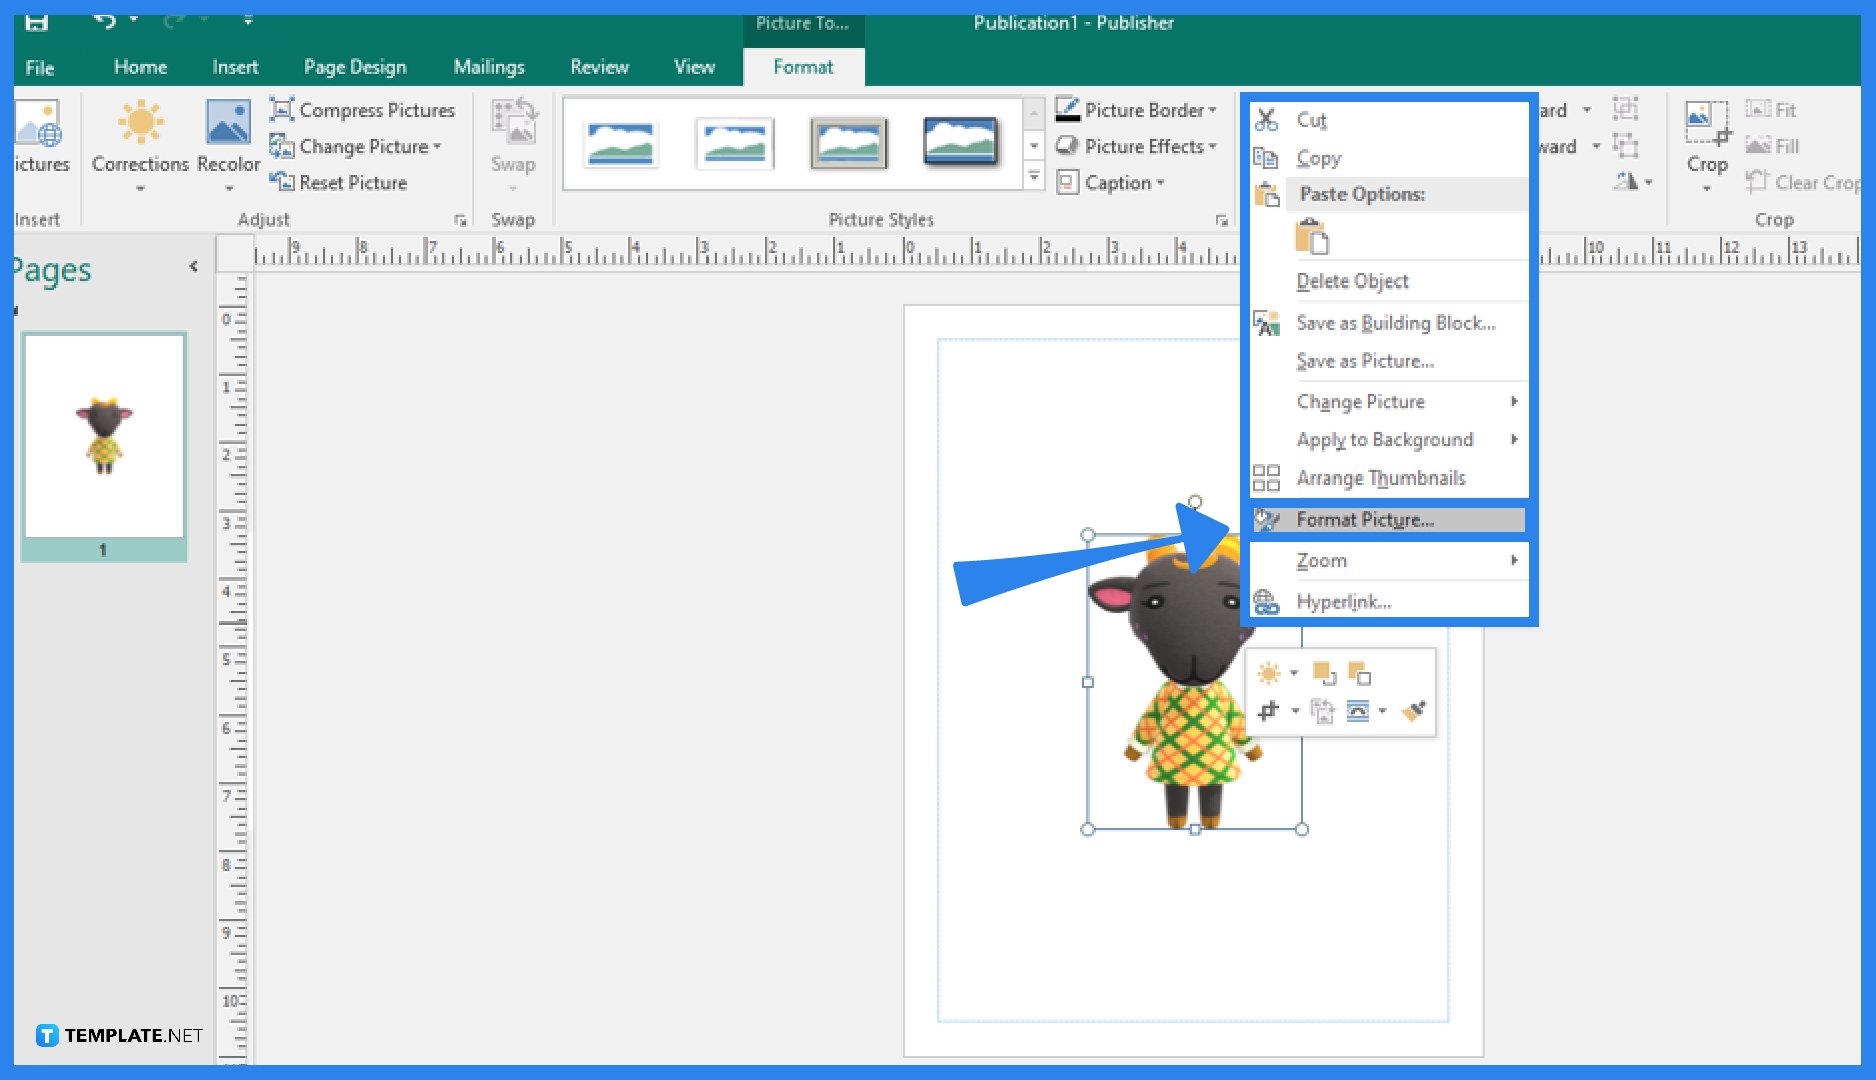
Start your Microsoft Publisher application and open the publication where you have the picture you want to flatten or compress. Once opened, perform a right-click on the picture. Then, from the pop-up menu that displays, select the Format Picture option.
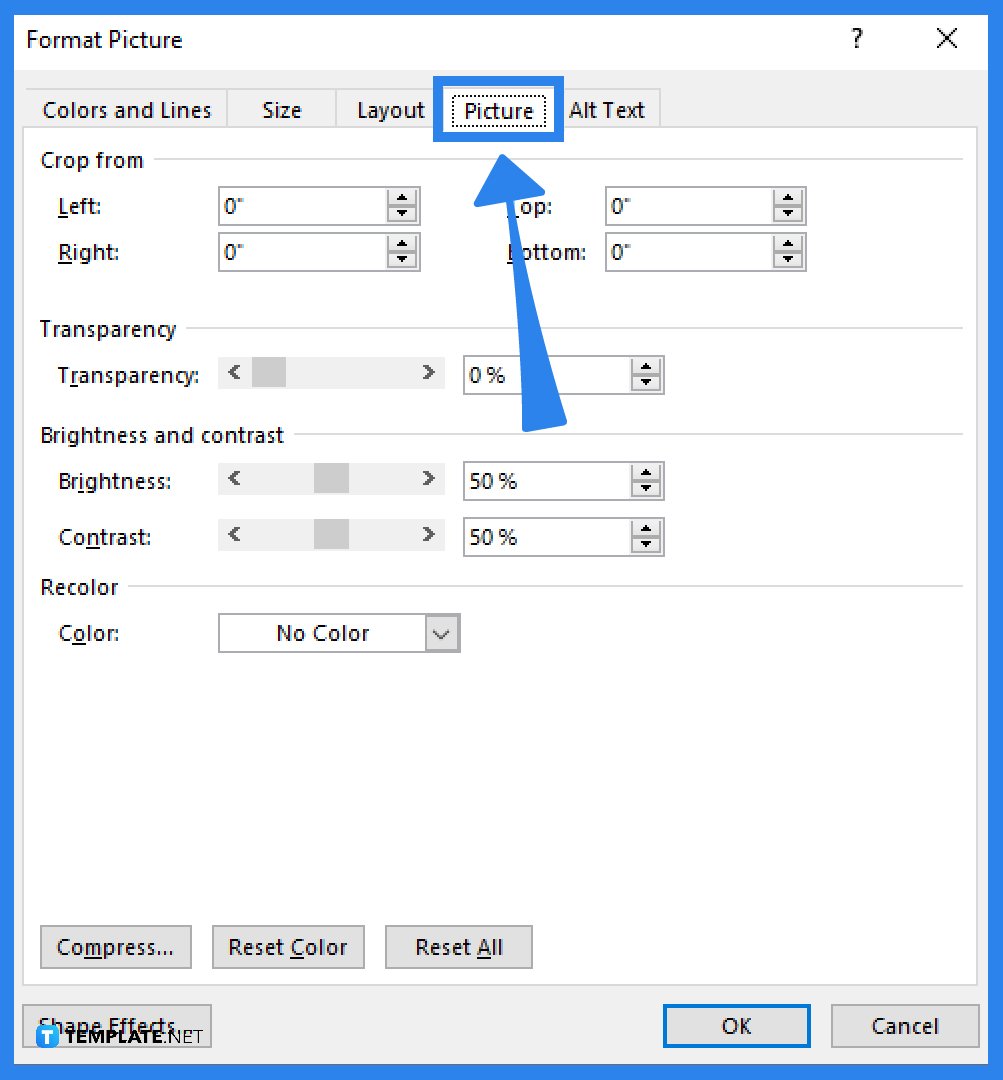
A Format Picture dialog menu will appear after clicking the Format Picture option and, under it, choose the Picture menu. Then, click on the Compress button at the lower-left part of the menu.
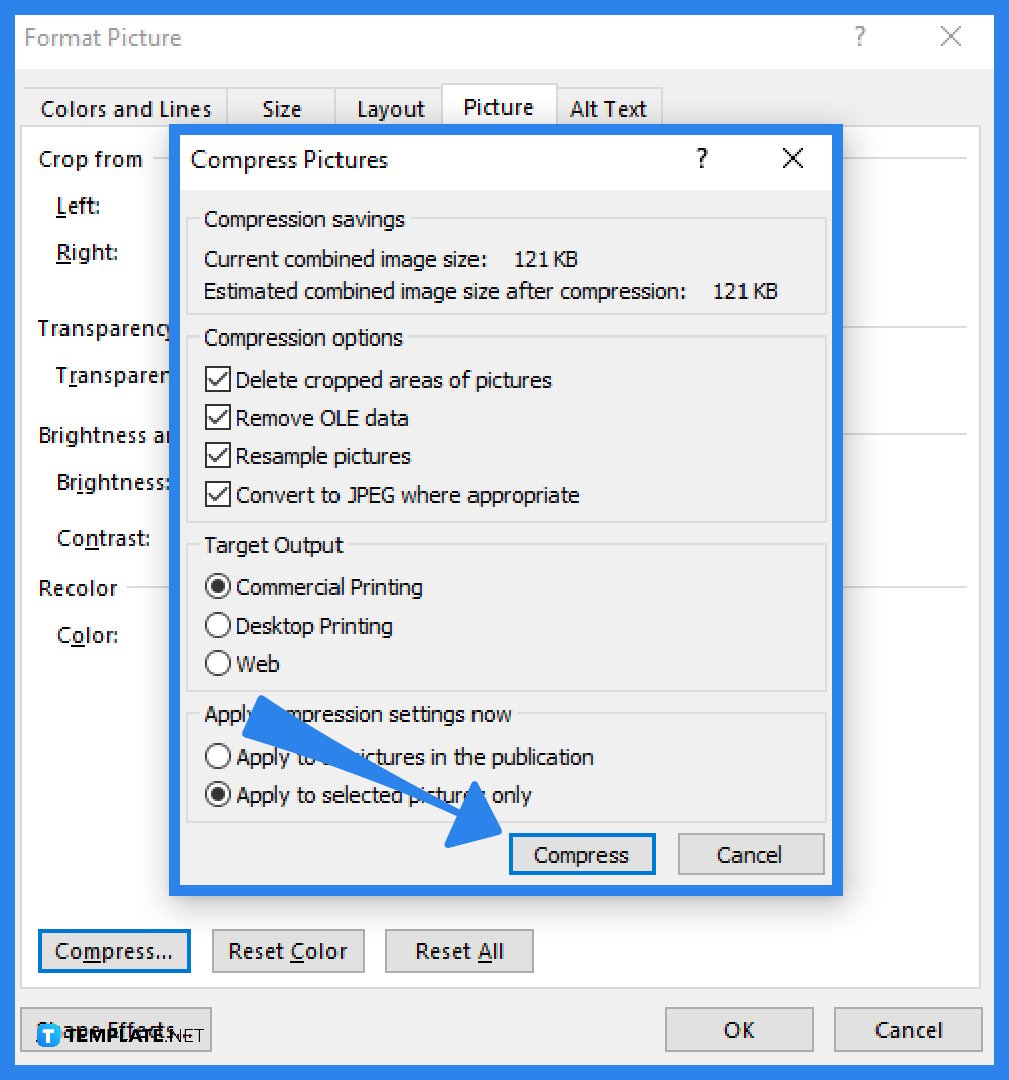
Under the Target Output setting in the Compress Pictures dialog box that appears, do one of the following: select Commercial Printing to reduce the image resolution to 300 pixels per inch (ppi), select Desktop Printing to reduce the image resolution to 220 ppi, or select Web to reduce the image resolution to 96 ppi. After that, move to the “Apply compression settings now” setting and select whether you want to compress all of the publication’s images or only the ones you selected. Then, click Compress and select Yes if a message appears asking whether you want to apply picture optimization. The original high-resolution image or images are replaced with a compressed version of the same image after you click OK.
If you want to know the effective resolution of a picture in your publication, go to the View tab, choose the Graphics Manager option, click on the arrow-down in the “Select a picture” option at the right side of the screen, select Details, and the resolution is shown in dots per inch (dpi) in the Effective Resolution field.
Dots per inch (DPI), a measurement of a printer’s resolution, effectively describes how many ink dots are applied to a sheet of paper or other surface per square inch.
The term “pixels per inch” (ppi) is used to describe the resolution of a digital picture or video display and which is most often used to refer to the display resolution, or pixel density, of a computer monitor or screen (the greater the pixels per inch (ppi), the greater the detail in the image or display).

Signatures found in documents establish who you are as an individual or as an organization. Aside from the fact that…
![How To Make/Create a Newsletter in Microsoft Outlook [Templates + Examples] 2026](https://images.template.net/wp-content/uploads/2022/07/How-to-Start-a-Newsletter-with-Microsoft-Outlook-788x443.jpg)
Newsletters enable companies and organizations to communicate relevant and helpful information to their client, prospects, and subscribers. By giving you…
![How To Make/Create a Booklet in Microsoft Publisher [Templates + Examples] 2026](https://images.template.net/wp-content/uploads/2022/08/How-To-Make_Create-a-Booklet-in-Microsoft-Publisher-788x443.png)
Booklet templates are pre-designed layouts that make it easy to create a professional-looking booklet. They typically include placeholders for text…
![How To Make/Create a Booklet in Microsoft PowerPoint [Templates + Examples] 2026](https://images.template.net/wp-content/uploads/2022/07/How-To-Make-Create-a-Booklet-in-Microsoft-PowerPoint-788x443.jpg)
Booklets can be created in Microsoft PowerPoint, which offers a design feature that allows users to display them in PPT…
![How to Automatically Fill PDF Forms Using Microsoft Excel [Templates + Examples] 2026](https://images.template.net/wp-content/uploads/2022/07/How-to-Automatically-Fill-PDF-Forms-Using-Microsoft-Excel-788x444.png)
Automatically fill PDF forms using Microsoft Excel so you won’t have to save multiple PDF forms in an Excel spreadsheet…
![How to Make/Create a Floor Plan on Microsoft Excel [Templates + Examples] 2026](https://images.template.net/wp-content/uploads/2022/07/How-to-Make-a-Floor-Plan-on-Microsoft-Excel-788x443.jpg)
Floor plans either make or break projects related to engineering and architecture. That being said, every apartment room, bedroom, living…
![How to Make/Create a Grid in Microsoft Word [Templates + Examples] 2026](https://images.template.net/wp-content/uploads/2022/07/How-to-Make_Create-a-Grid-in-Microsoft-Word-788x444.jpg)
Grids consist of a network of lines that work as graphic cues while formatting your document in Microsoft Office. If…
![How to Add More Highlight Colors to Microsoft Word [Templates + Examples] 2026](https://images.template.net/wp-content/uploads/2022/07/How-to-Add-More-Highlight-Colors-to-Microsoft-Word-Templates-Examples-2023-788x443.jpg)
Add more highlight colors to Microsoft Word so you won’t have to settle with the default shading color in marking…
![How to Make/Create a Border in Microsoft Publisher [Templates + Examples] 2026](https://images.template.net/wp-content/uploads/2022/08/How-to-MakeCreate-a-Border-in-Microsoft-Publisher-788x444.png)
Borders are graphic design elements that make a document more pleasing and stylish to look at. This can be used…