![How to Add a Signature in Microsoft Forms [Templates + Examples] 2026](https://images.template.net/wp-content/uploads/2022/07/How-to-Add-a-Signature-in-Microsoft-Forms-Templates-Examples-2023-788x443.jpg)
How to Add a Signature in Microsoft Forms [Templates + Examples] 2026
Signatures found in documents establish who you are as an individual or as an organization. Aside from the fact that…
Dec 22, 2025


Sep 02, 2025
Microsoft Visio is an excellent tool and application for creating visual representations of flows and processes using creative and beautiful diagrams that are easy to understand, including flowcharts, floor plans, organization charts, flow diagrams, swimlane diagrams, and many more. Users must be wary of the various elements in developing visual diagrams, including how to use layers in Microsoft Visio properly and effectively.

Microsoft Visio makes use of layers that automatically link to the shapes inserted into the file and assigns layers to shapes as necessary. The section below helps users understand how to create and use these layers according to the graph, chart, or diagram they want to establish for their project.
Open the Microsoft Visio application on the computer and click on the New tab to open a new document. Users have the option to start their diagrams from scratch or select a template from the Microsoft library by typing the name of the diagram they need on the search bar.
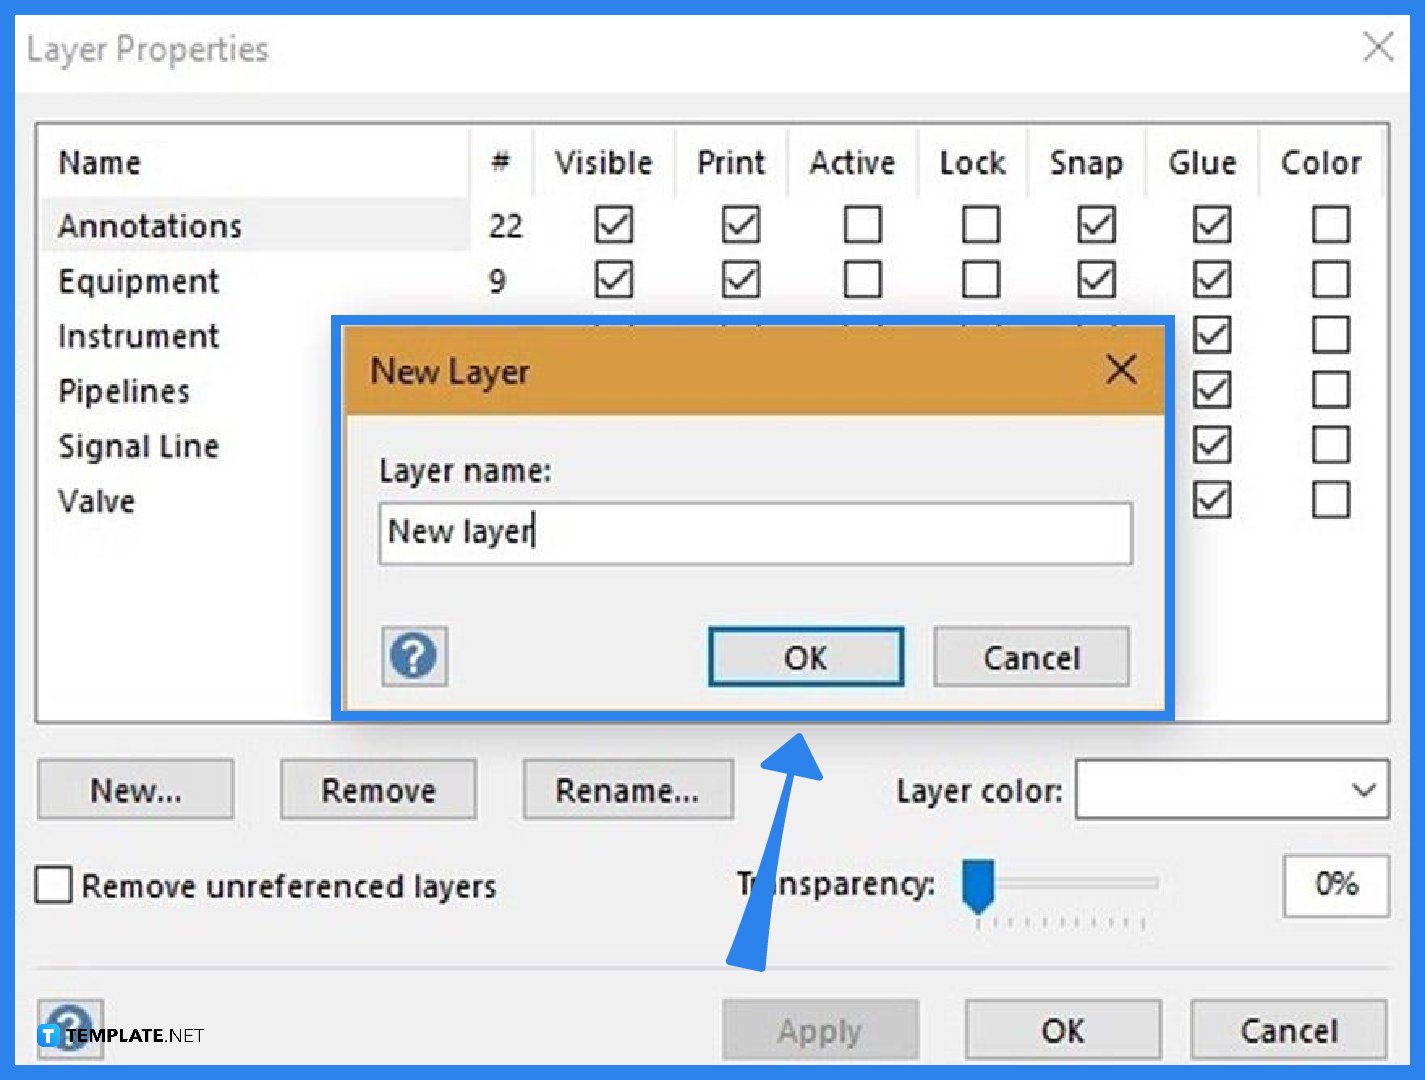
After opening a template or creating a blank document, insert layers into the file by going to the Layer properties, look for the dialog box in the Layers drop-down menu in the Editing section of the Home tab, then select New. A pop-up window will appear that allows the user to edit the name of the new layer.
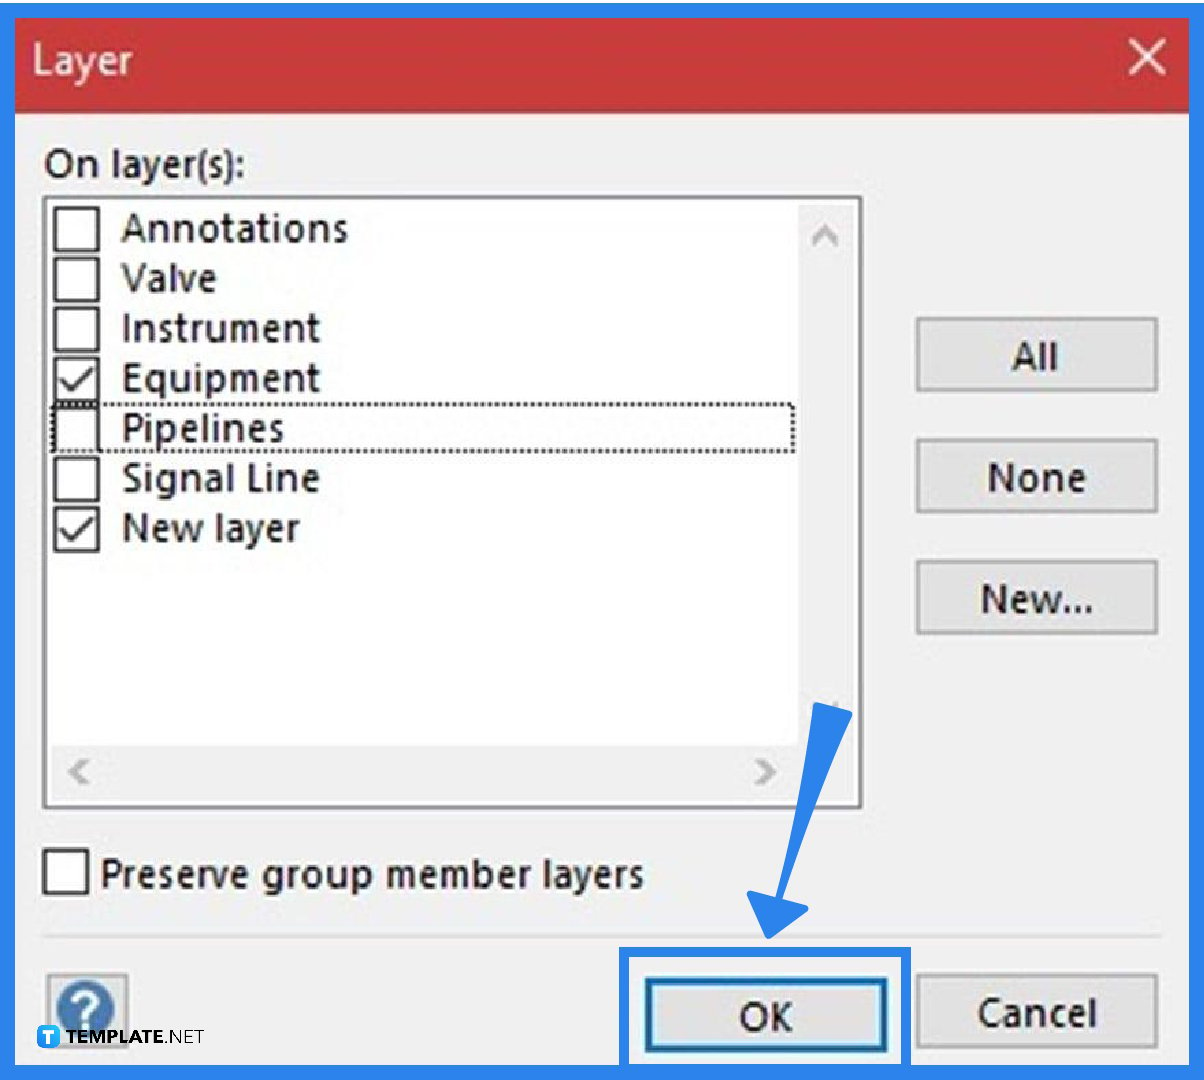
Select the shape or the connector in the document, and on the diagram, click on the Assign to Layer button from the Layers drop-down menu in the Editing section of the Home tab, to assign a shape to a specific layer. A pop-up window appears through a Layer dialog box that allows the user to designate a shape to a new or existing layer in the diagram. Note that users can use the shape for more than one layer of the diagram, and once everything is in order, click the OK button to save.
Layer properties is a dialog box that allows users to change the properties for individual layers in a document, comprising several checkboxes supporting different features, including name, color, print, active, lock, glue, snap, etc.
On a document, click on the Home tab, hover over the Editing group, select Layers, and click on Layer properties to open the dialog box, clearing or selecting the Visible column checkbox to hide or show layers.
For individuals using Visio 2013, open it using Developer Mode, select Options, Customize Ribbon, then select Developer; select two shapes in the document, click on the Developer tab, press the Operations button, and choose the Union or Combine options, allowing the shapes to overlap one another.

Signatures found in documents establish who you are as an individual or as an organization. Aside from the fact that…
![How To Make/Create a Newsletter in Microsoft Outlook [Templates + Examples] 2026](https://images.template.net/wp-content/uploads/2022/07/How-to-Start-a-Newsletter-with-Microsoft-Outlook-788x443.jpg)
Newsletters enable companies and organizations to communicate relevant and helpful information to their client, prospects, and subscribers. By giving you…
![How To Make/Create a Booklet in Microsoft Publisher [Templates + Examples] 2026](https://images.template.net/wp-content/uploads/2022/08/How-To-Make_Create-a-Booklet-in-Microsoft-Publisher-788x443.png)
Booklet templates are pre-designed layouts that make it easy to create a professional-looking booklet. They typically include placeholders for text…
![How To Make/Create a Booklet in Microsoft PowerPoint [Templates + Examples] 2026](https://images.template.net/wp-content/uploads/2022/07/How-To-Make-Create-a-Booklet-in-Microsoft-PowerPoint-788x443.jpg)
Booklets can be created in Microsoft PowerPoint, which offers a design feature that allows users to display them in PPT…
![How to Automatically Fill PDF Forms Using Microsoft Excel [Templates + Examples] 2026](https://images.template.net/wp-content/uploads/2022/07/How-to-Automatically-Fill-PDF-Forms-Using-Microsoft-Excel-788x444.png)
Automatically fill PDF forms using Microsoft Excel so you won’t have to save multiple PDF forms in an Excel spreadsheet…
![How to Make/Create a Floor Plan on Microsoft Excel [Templates + Examples] 2026](https://images.template.net/wp-content/uploads/2022/07/How-to-Make-a-Floor-Plan-on-Microsoft-Excel-788x443.jpg)
Floor plans either make or break projects related to engineering and architecture. That being said, every apartment room, bedroom, living…
![How to Make/Create a Grid in Microsoft Word [Templates + Examples] 2026](https://images.template.net/wp-content/uploads/2022/07/How-to-Make_Create-a-Grid-in-Microsoft-Word-788x444.jpg)
Grids consist of a network of lines that work as graphic cues while formatting your document in Microsoft Office. If…
![How to Add More Highlight Colors to Microsoft Word [Templates + Examples] 2026](https://images.template.net/wp-content/uploads/2022/07/How-to-Add-More-Highlight-Colors-to-Microsoft-Word-Templates-Examples-2023-788x443.jpg)
Add more highlight colors to Microsoft Word so you won’t have to settle with the default shading color in marking…
![How to Make/Create a Border in Microsoft Publisher [Templates + Examples] 2026](https://images.template.net/wp-content/uploads/2022/08/How-to-MakeCreate-a-Border-in-Microsoft-Publisher-788x444.png)
Borders are graphic design elements that make a document more pleasing and stylish to look at. This can be used…