![How to Add a Signature in Microsoft Forms [Templates + Examples] 2026](https://images.template.net/wp-content/uploads/2022/07/How-to-Add-a-Signature-in-Microsoft-Forms-Templates-Examples-2023-788x443.jpg)
How to Add a Signature in Microsoft Forms [Templates + Examples] 2026
Signatures found in documents establish who you are as an individual or as an organization. Aside from the fact that…
Dec 22, 2025


Sep 02, 2025
Microsoft Whiteboard incorporates the ruler tool into its program, allowing its users to have a seamless experience in drawing straight and angled lines on the whiteboard. The user can modify the ruler’s position and angle within the whiteboard.

The ruler tool in Microsoft Whiteboard is a useful utility tool that lets the user measure and draw out straight lines in just a single click. The user can also use the ruler tool as a way to organize and check if the pictures and drawings on the whiteboard are properly positioned and angled.
To use and rotate the ruler tool in Microsoft Whiteboard, the user must first boot up the program on their desktop. The ruler tool is available in all versions of Microsoft Whiteboard.

After the user has booted up Microsoft Whiteboard, they must either select an existing whiteboard or create a new one. If the user wants to select an existing whiteboard they must left-click any of the whiteboards in their collection.
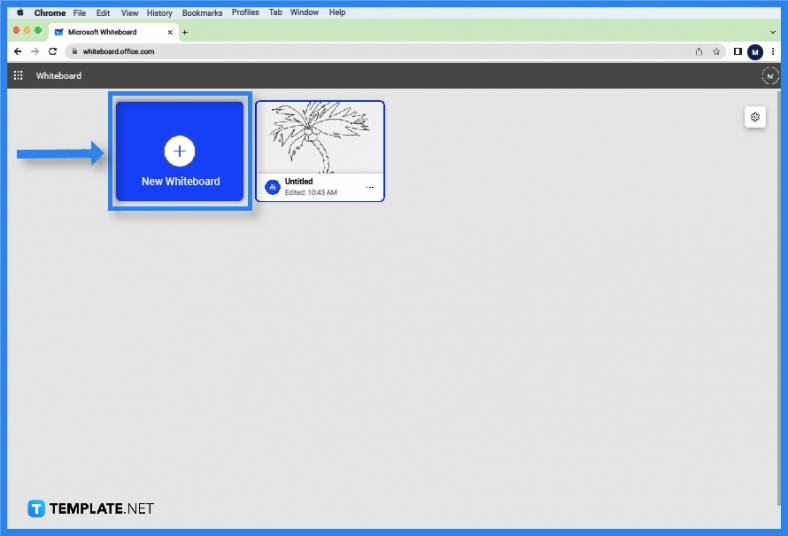
But if the user wants to create a new whiteboard for them to use, they must click the “New whiteboard button on the landing page.”
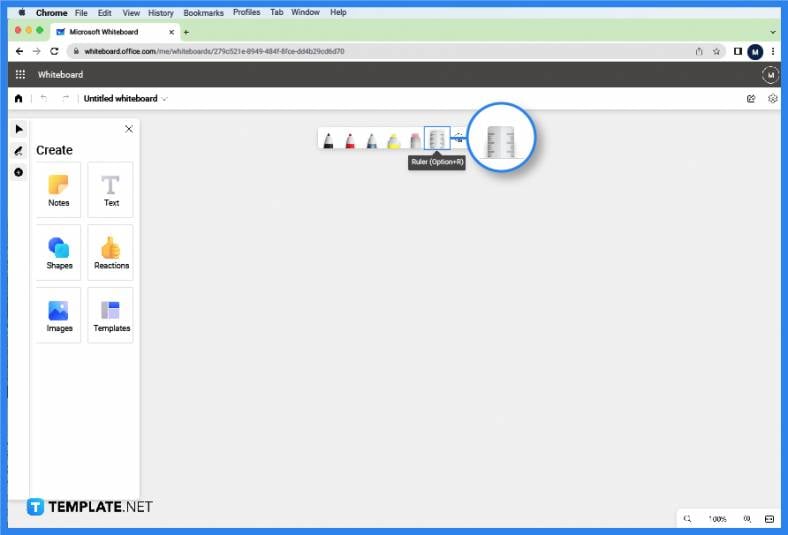
After the user has entered the whiteboard, they will have access to the toolbar. This is where one can find most of the tools on Microsoft Whiteboard. To enable the ruler tool, the user must press the “Ruler” button on the toolbar.
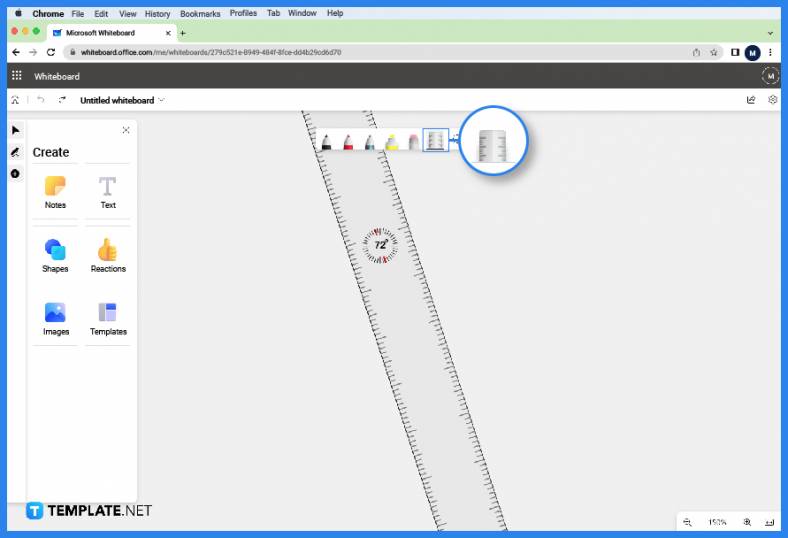
This should make a ruler appear in the middle of the user’s screen. To rotate the ruler the user must either select the ruler by left-clicking it or hover their mouse pointer over it, and then the user can select the angle of the ruler by scrolling their mouse wheel up or down.
You cannot modify the size of the ruler tool directly; instead, you can zoom in or out of the whiteboard, which allows you to change the view interposed with the ruler.
First, you must select the ruler by pressing the Tab key on your keyboard, which is indicated by a black border surrounding it; after you have selected the ruler, hold the Alt key and press the left and right arrow keys to shift the angle by 15 degrees.
The developers of Microsoft Whiteboard have programmed the ruler tool to be more rigid as compared to the other tools hosted by the program; as such, the Ruler can’t be locked into place by the user.
After you have used the ruler, you can disable the toggle by pressing the ruler button located on the toolbar of Microsoft Whiteboard.
Microsoft Whiteboard hosts numerous quality-of-life integrations on their tools, one of which is the saving of the last known position and angle of the ruler tool making sure that the user will not lose the orientation of their ruler.

Signatures found in documents establish who you are as an individual or as an organization. Aside from the fact that…
![How To Make/Create a Newsletter in Microsoft Outlook [Templates + Examples] 2026](https://images.template.net/wp-content/uploads/2022/07/How-to-Start-a-Newsletter-with-Microsoft-Outlook-788x443.jpg)
Newsletters enable companies and organizations to communicate relevant and helpful information to their client, prospects, and subscribers. By giving you…
![How To Make/Create a Booklet in Microsoft Publisher [Templates + Examples] 2026](https://images.template.net/wp-content/uploads/2022/08/How-To-Make_Create-a-Booklet-in-Microsoft-Publisher-788x443.png)
Booklet templates are pre-designed layouts that make it easy to create a professional-looking booklet. They typically include placeholders for text…
![How To Make/Create a Booklet in Microsoft PowerPoint [Templates + Examples] 2026](https://images.template.net/wp-content/uploads/2022/07/How-To-Make-Create-a-Booklet-in-Microsoft-PowerPoint-788x443.jpg)
Booklets can be created in Microsoft PowerPoint, which offers a design feature that allows users to display them in PPT…
![How to Automatically Fill PDF Forms Using Microsoft Excel [Templates + Examples] 2026](https://images.template.net/wp-content/uploads/2022/07/How-to-Automatically-Fill-PDF-Forms-Using-Microsoft-Excel-788x444.png)
Automatically fill PDF forms using Microsoft Excel so you won’t have to save multiple PDF forms in an Excel spreadsheet…
![How to Make/Create a Floor Plan on Microsoft Excel [Templates + Examples] 2026](https://images.template.net/wp-content/uploads/2022/07/How-to-Make-a-Floor-Plan-on-Microsoft-Excel-788x443.jpg)
Floor plans either make or break projects related to engineering and architecture. That being said, every apartment room, bedroom, living…
![How to Make/Create a Grid in Microsoft Word [Templates + Examples] 2026](https://images.template.net/wp-content/uploads/2022/07/How-to-Make_Create-a-Grid-in-Microsoft-Word-788x444.jpg)
Grids consist of a network of lines that work as graphic cues while formatting your document in Microsoft Office. If…
![How to Add More Highlight Colors to Microsoft Word [Templates + Examples] 2026](https://images.template.net/wp-content/uploads/2022/07/How-to-Add-More-Highlight-Colors-to-Microsoft-Word-Templates-Examples-2023-788x443.jpg)
Add more highlight colors to Microsoft Word so you won’t have to settle with the default shading color in marking…
![How to Make/Create a Border in Microsoft Publisher [Templates + Examples] 2026](https://images.template.net/wp-content/uploads/2022/08/How-to-MakeCreate-a-Border-in-Microsoft-Publisher-788x444.png)
Borders are graphic design elements that make a document more pleasing and stylish to look at. This can be used…