


How to Change the Default Font in Word
Microsoft Word provides a comprehensive solution for customizing your documents, and changing the default font is a simple yet impactful way to tailor your content. This guide walks you through the process of how to select and set a new default font that suits your specific needs.

How to Change the Default Font in Word
-
1. Setting the Default Font in MS Word for Windows
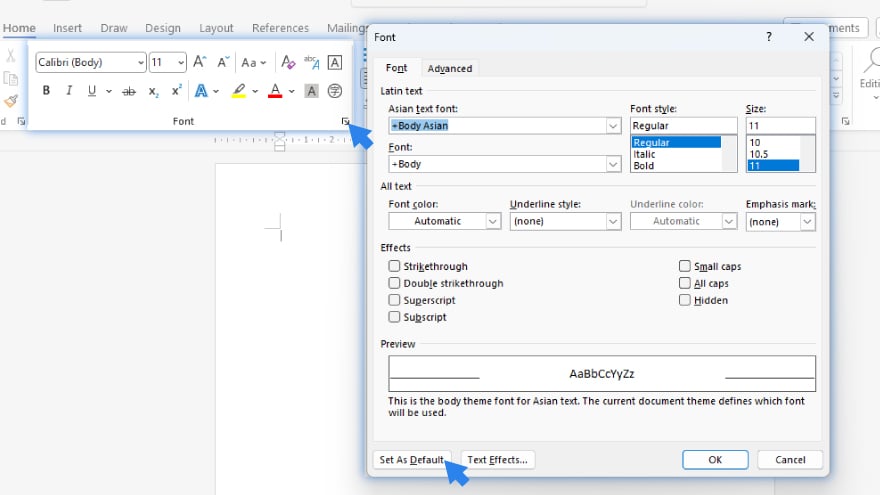
To consistently use your preferred font in Microsoft Word on Windows, you can set it as the default. Start by navigating to the ‘Home’ tab, and then click on the ‘Font Dialog Box Launcher.’ Here, you can choose your desired font and size. After making your selection, click ‘Set As Default.’ You will be prompted to apply this change to either ‘This document only’ or ‘All documents based on the Normal template.’ Confirm your choice by clicking ‘OK’ twice.
-
2. Troubleshooting Default Font Settings in Windows
Sometimes, your default font settings might not save. To resolve this, begin by checking the permissions. Click the ‘Start’ button and enter ‘Normal.dotm’ in the search box, then press ‘Search.’ Right-click on ‘Normal.dotm’ and select ‘Properties.’ In the ‘General’ tab, ensure that the ‘Read-only’ option is not selected. If it is, uncheck it. Then, move to the ‘Security’ tab. Here, under ‘Group or user names,’ select your name and confirm that you have ‘Write’ permission in the ‘Permissions’ box. Click ‘OK’ to save changes.
You may also find valuable insights in the following articles offering tips for Microsoft Word:
3. Setting the Default Font in MS Word for macOS
For macOS users, setting your favorite font as the default in Word is straightforward. Go to ‘Format,’ then ‘Font,’ and finally ‘Font’ again. You can also access the ‘Font’ dialog box by pressing and holding ‘Command (?)’ and ‘D.’ In this dialog box, choose the font and size that you prefer. Then, click on ‘Default,’ and then confirm your choice by selecting ‘Yes.’ Click ‘OK’ to finalize the setting. Also, learn how to add fonts to Microsoft Word to have more than just the default options available for use.
4. Troubleshooting Default Font Settings in macOS
If you encounter issues with the default font settings not being retained on macOS, you should check the file permissions. Open ‘Finder’ and use the search box to find ‘Normal.dotm.’ Once located, select ‘Get Info’ from the ‘File’ menu or press ‘Command (?)’ and ‘I’ together. In the ‘Get Info’ window, go to ‘General’ and make sure the ‘Locked’ option is unchecked. If it is checked, uncheck it. Then, navigate to ‘Sharing & Permissions.’ Here, verify that next to your name, you have ‘Read & Write’ permission listed under ‘Privilege.’
FAQs
How do I change the default font in Microsoft Word?
Open the Font Dialog Box in Word and select ‘Set As Default’ after choosing your preferred font and size.
Can I set a default font for all documents in Word?
Yes, you can set a default font for all documents by selecting ‘All documents based on the Normal template’ in the Font Dialog Box.
What should I do if my default font settings do not save in Word?
Check and adjust the permissions of the ‘Normal.dotm’ file in your system settings.
Is the process of setting a default font in Word different for macOS?
Yes, on macOS, use the ‘Format > Font’ menu or press ‘Command + D’ to access the Font dialog box.
How can I ensure my font changes are applied to every new Word document?
Choose the ‘All documents based on the Normal template’ option when setting your default font.
More in Microsoft
| How to Add or Edit a Header or Footer in Word | How to Create a Document in Word |

