How to Create a Hanging Indent in Word
Microsoft Word‘s hanging indent is helpful in creating bibliographies, reference lists, and citations, ensuring a clean and organized layout. We’ll walk you through the easy steps to achieve a hanging indent in Word, allowing you to present your information in a polished and professional manner.

How to Create a Hanging Indent in Word
-
Step 1. Select the text
Begin by highlighting the text to which you want to apply the hanging indent. Click and drag your cursor to cover the specific paragraphs or lines.
-
Step 2. Access the Paragraph Dialog:

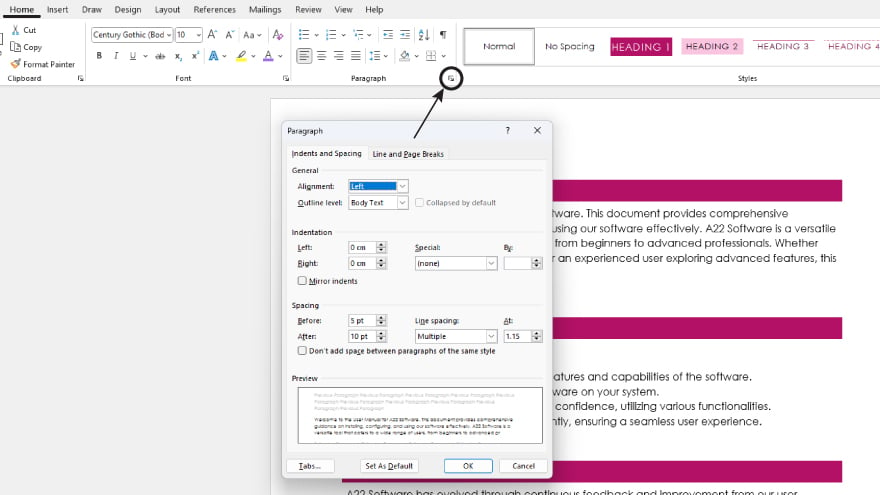
Navigate to the “Home” tab in the Word ribbon. Look for the “Paragraph” group and click on the small arrow in the lower right corner, known as the “Paragraph dialog launcher.” This opens the Paragraph dialog box.
-
Step 3. Open the Indents and Spacing Tab
Navigate to the “Indents and Spacing” tab within the Paragraph dialog box.
-
Step 4. Choose Hanging under Special

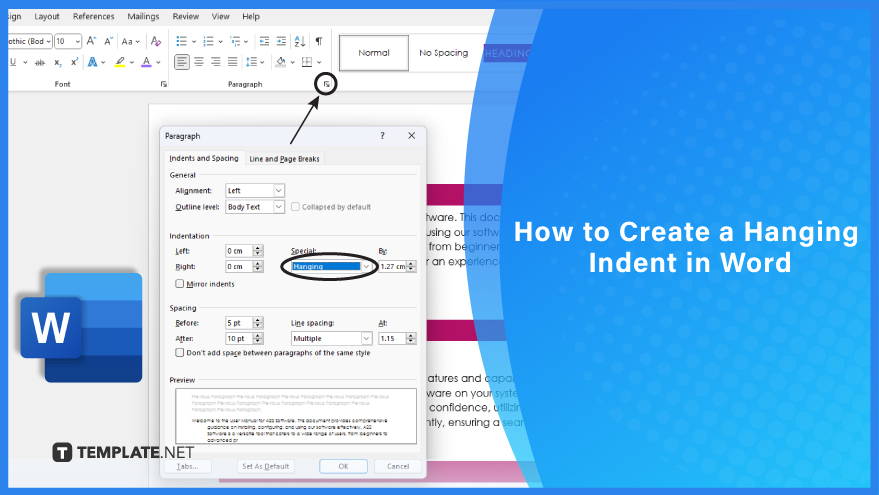
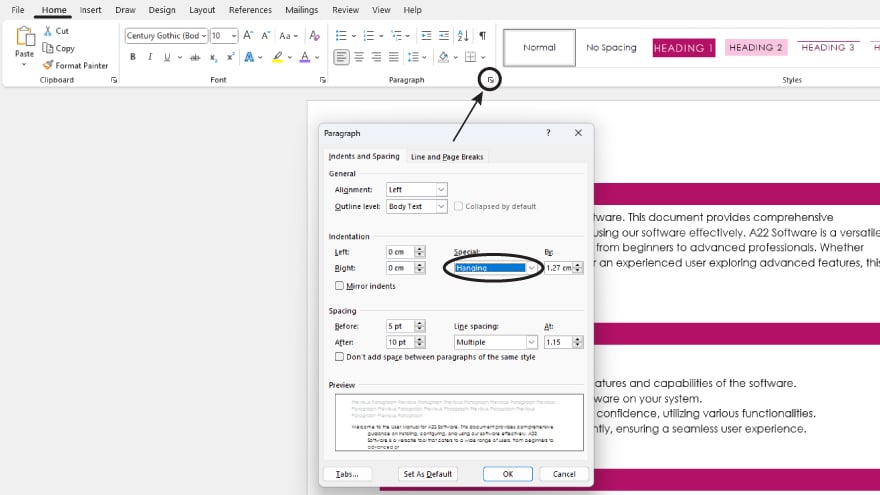
Under the “Special” section in the Indents and Spacing tab, locate and select “Hanging” from the drop-down menu. This tells Word that you want a hanging indent for the selected text.
-
Step 5. Adjust the Indent Depth:

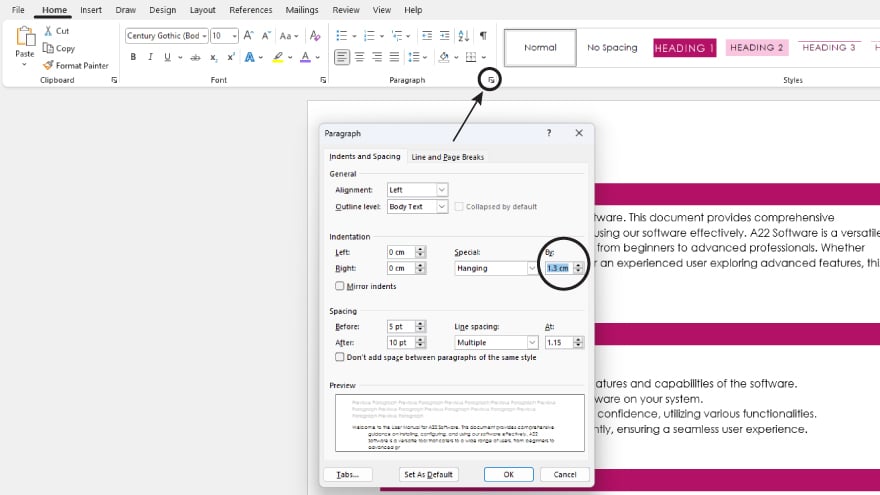
Optionally, you can adjust the depth of the hanging indent using the “By” field. This field allows you to specify the amount of space (in inches or other units) for the hanging indent. Experiment with different values to achieve the desired appearance.
-
Step 6. Select OK
After configuring the hanging indent settings, click the “OK” button to apply the changes. Your selected text will now display a hanging indent, with the first line positioned to the left and subsequent lines indented.
You may also find valuable insights in the following articles offering tips for Microsoft Word:
FAQs
What tab should you navigate to within the Paragraph dialog box?
Navigate to the “Indents and Spacing” tab within the Paragraph dialog box to access hanging indent settings.
Under which section in the Indents and Spacing tab do you select Hanging?
Under the “Special” section in the Indents and Spacing tab, choose “Hanging” from the drop-down menu.
Can you customize the depth of the hanging indent, and if so, how?
Yes, you can adjust the depth of the indent using the “By” field in the Paragraph dialog box, specifying the desired amount of space.
What is the purpose of adjusting the depth of the hanging indent?
Adjusting the depth allows you to control the amount of space by which the subsequent lines are indented, offering flexibility in formatting.
After changing the Paragraph dialog box, what do you click to apply the hanging indent?
Click the “OK” button to apply the configured hanging indent settings to the selected text.
More in Microsoft
| How to Add or Edit a Header or Footer in Word | How to Create a Document in Word |


