


How to Turn a Drawing into an SVG File
Turn your artwork into something fabulous with Adobe and get it ready for printing following the simple steps provided in this article. SVG, as a vector graphic, is not only great for websites but also for your crafting essentials.

How to Turn a Drawing into an SVG File
SVGs are easy to scale and fun to work with. So if you are looking for an interactive image file for all your drawings, look no further because SVG will make your artwork even better.
-
Step 1: Take a Clear Picture of the Drawing
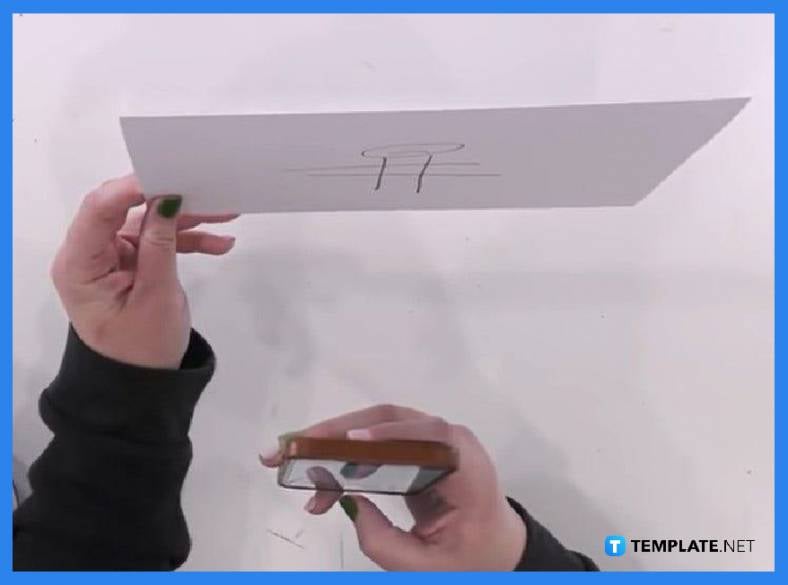
Your artwork must have been created on real paper or canvas, and thus, needs to be turned into a digital image file that the software can read. Once you have taken a photo of it, transfer it to your computer so you can easily export or upload this to your Cricut Design Space. You may use a separate app on your mobile device to enhance or brighten the photo, as well as do away with the shadow.
-
Step 2: Upload the Photo to Design Space
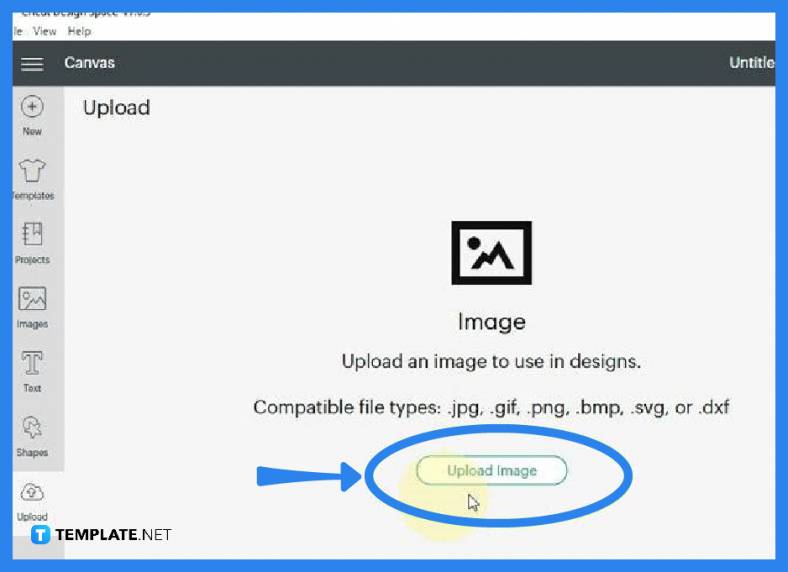
Now, open your Cricut Design Space and head over to the “Upload” button on the left side pane where the other tools are located. As you click it, the “Upload” window will open and you will have to click on the “Upload Image” button to browse for that photo. Alternatively, you can simply drag and drop the photo unto your canvas.
-
Step 3: Go to Select Image Type
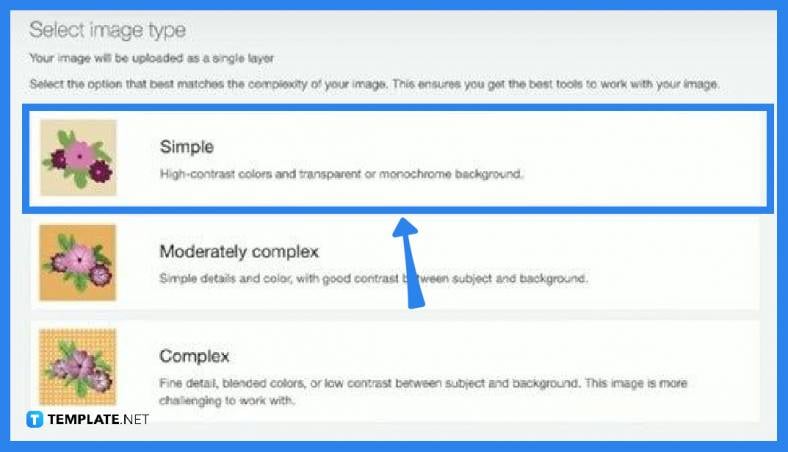
When the photo of your drawing is uploaded, you will be asked to select from “Simple,” “Moderately Complex,” and “Complex” image type options. This prompt is for the software to match the best tool for the level of complexity of your image. Once you have selected, proceed to the bottom right and click “Continue.”
-
Step 4: Do the Necessary Enhancements of the Image
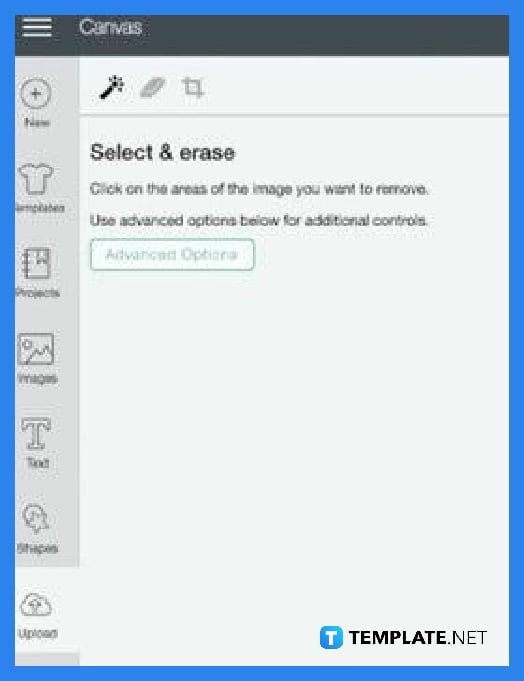
Your photo will be loaded on the canvas and the left side pane, as well as the top left, you have some special tools you can use to work on the project. Just navigate through these and take the pleasure of enhancing them as you wish. Click “Continue” when finished.
-
Step 5: Save the Newly Created SVG File
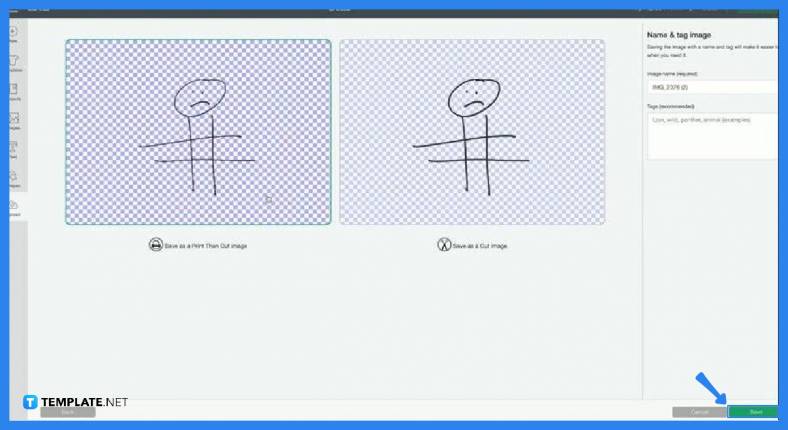
In the window that follows, you will be prompted to select between “Save as a Print then Cut Image” and “Save as a Cut Image” before you can save the project entirely. When you have selected, head over to the right-side panel where you need to give your project a name. Click “Save” at the bottom right and Cricut Design Space will automatically save your file as an SVG.
FAQs
What makes the SVG format ideal for images?
SVG is a vector file that displays two-dimensional graphics on websites which can be scaled up or down with indestructible resolution quality.
Can drawings be made into SVG?
Yes, just follow the instructions above and you will have your artwork converted in minutes.
Is SVG suitable for printing clothing?
Yes, SVG is ideally used for printing clothing and crafting due to its image quality which cannot be destroyed when scaled up or down.
More in Adobe

