


How to Save a Mesh Object as SVG Format in Illustrator
Converting a mesh object into a regular Adobe SVG path object can truly be easier said than done, especially for the not-so-techy ones. Doing so will help get your work done quicker as SVG files are fully compatible and editable with Adobe Illustrator.

How to Save a Mesh Object as SVG Format in Illustrator
The MESH file format is a technology used in creating 3D models that consist of polygons while the SVG file format is a 2D vector graphics format for illustrations or images intended for websites. While both have their strengths, Adobe Illustrator just does not support the MESH file format, but here is what you can do to save a mesh object in Illustrator.
-
Step 1: Bring Up the Mesh File to Adobe Illustrator
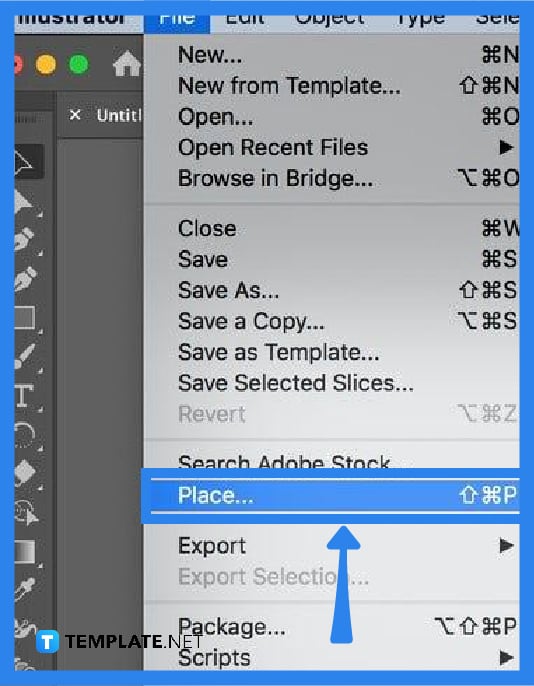
To save a mesh object as an SVG file in Illustrator, you first need to import the file and convert it later to SVG. To do this, create a new document in Illustrator and once you have it, go to the “File” options menu and select “Place” from the drop-down to load up the MESH file to your artboard. When placing, just click and drag the mouse pointer and release it to the size you want the mesh object to be displayed.
-
Step 2: Convert the Mesh Object to a Regular Path Object
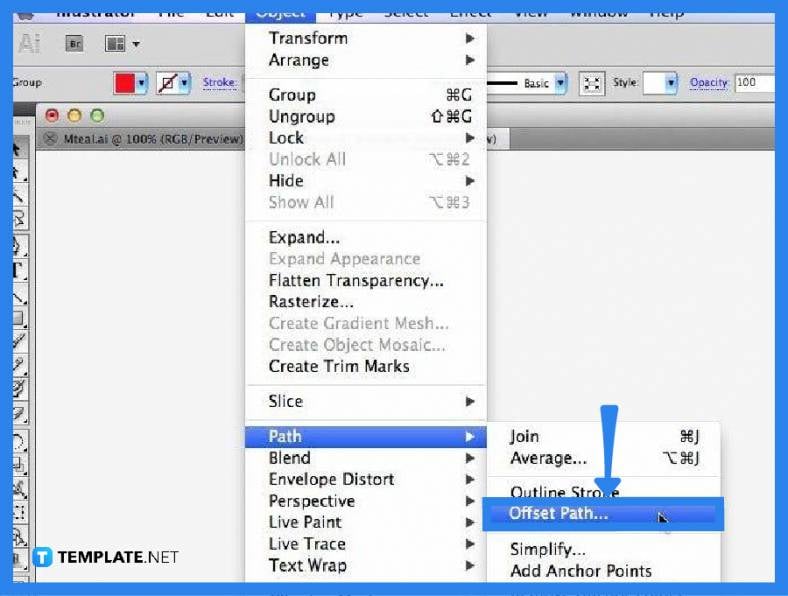
For your file to have a regular vector path, you need to remove the mesh from the object. To begin, head over to the “Selection” tool on the left side tool panel and select the mesh that you would like to convert. Then, head to the “Object” tab on the taskbar, click on “Path,” and select “Offset Path” from the drop-down menu.
-
Step 3: Create a New Object out from the Mesh Object
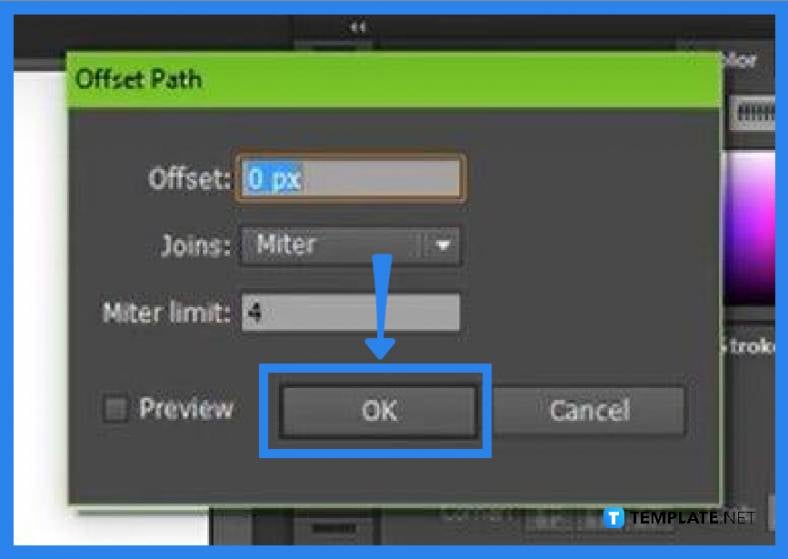
In the “Offset Path” dialog box that opens forthwith, you need to change the offset size to zero pixels and click “OK.” At this point, you should be seeing outlined points of the mesh object, but this does not necessarily change the image as your original MESH file will still be preserved. Turn off the visibility layer so you can have a clear view of the outline.
-
Step 4: Select the New Path Layer
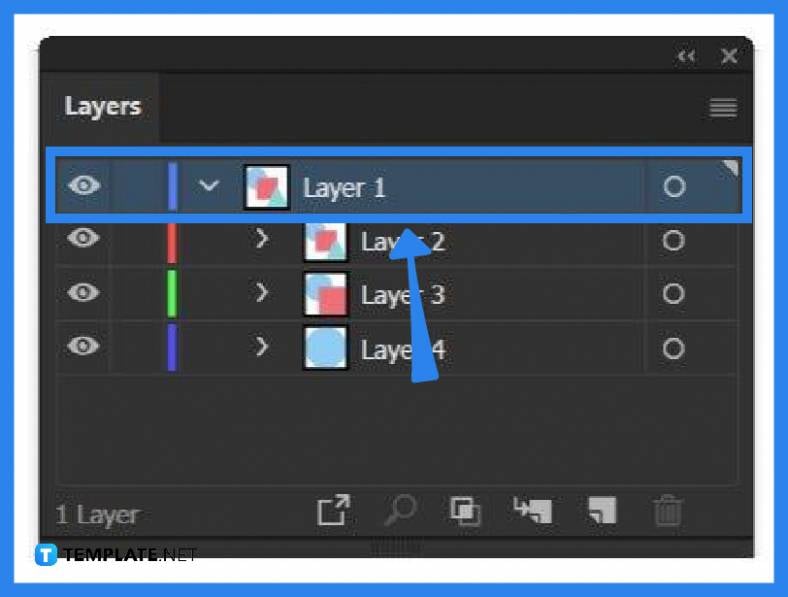
Go to the “Layers” panel on the right side of your artboard and select the new path layer. Having done that, you should now be able to modify and move the individual points of the object. After executing all the necessary changes, just go ahead and save your file as SVG.
-
Step 5: Save the File as SV>

Head over to “File,” then “Export,” and select “Export As.” Change the file format to SVG before clicking the “Export” button. And in the “SVG Options” dialog box that follows, just put the “SVG Profiles” to SVG 1.1 and then change the other settings if it applies, and click “OK.”
FAQs
What is the difference between a MESH file and an SVG file?
A MESH file is a three-dimensional vector graphics format while an SVG file is two-dimensional.
What is the SVG file format used for?
The SVG file format is used to display two-dimensional graphics or illustrations on websites with excellent scalability that retains its resolution regardless of being scaled up or down.
What is the MESH file format used for?
The MESH file format is used for 3D models or illustrations that have X, Y, and Z axes reference points and it consists of polygons.
More in Adobe

